Creating and administering a dataset
Creating a new dataset
- Click Create Flow from the left navigation panel.
- Click Dataset. There are templates you can choose from to get you started, or you can click +Create from Scratch.
- Enter the dataset name. You can also optionally add a description and category to help you organize and find your dataset later.
- Click Create.
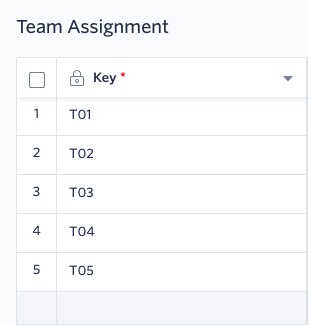
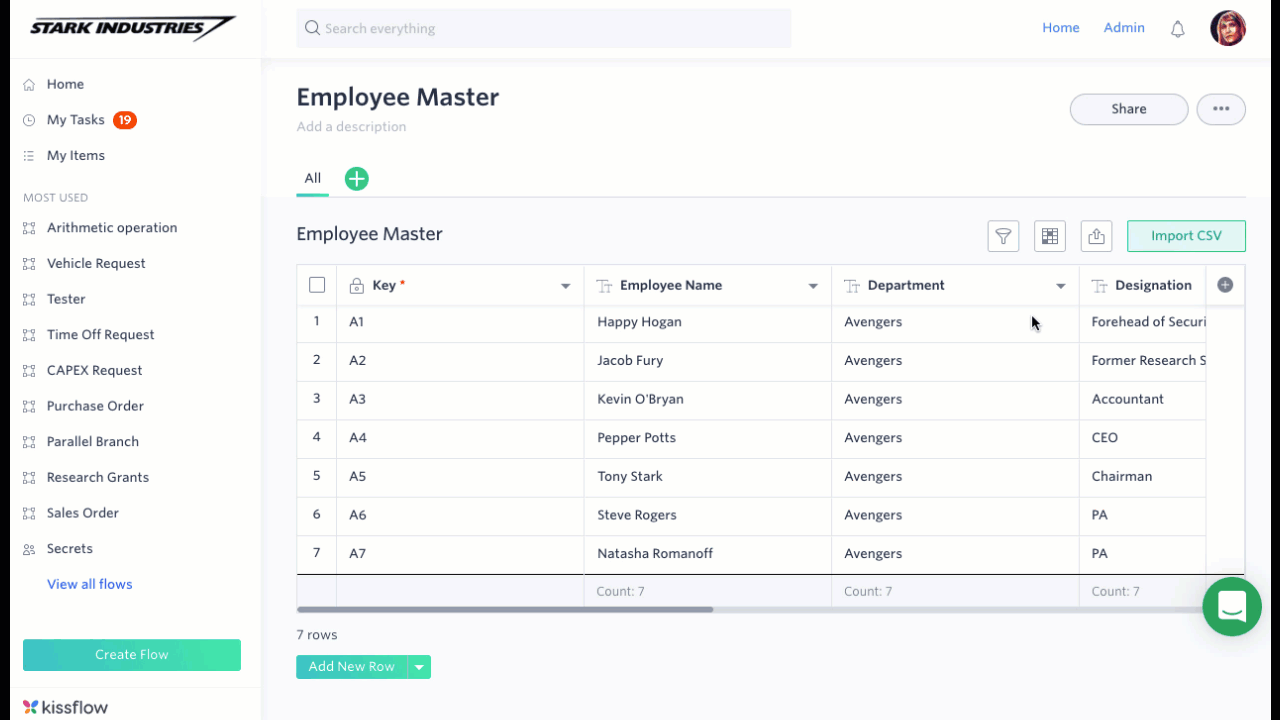
The Key field
The first field in the dataset is called Key. This is the only field you cannot rename, delete, or change the field type. Each row must contain a unique value such as an employee number, SKU, vendor name, or a serial number.
Renaming a dataset
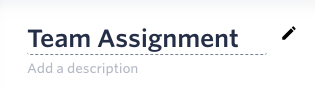
To rename your dataset, simply click on the current name, make changes, and then click Enter, or click off the name. You can change the description in the same way. All changes are auto-saved.
Finding a dataset
There are two ways to search for your dataset.
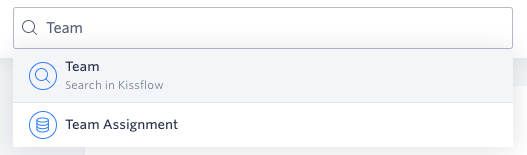
First, type the name of the dataset into the Search everything box on the top and click the right dataset.
Second, Click View all flows in the left navigation panel to open the Explorer. Then you can search, sort by type, or select the category of the dataset to find it quickly.
Sharing the dataset
To share your dataset, click the Share button.
The top of the popup will show if you are setting the sharing settings for the entire dataset, or just a particular view. If you only want to share a certain view, click on the correct option.
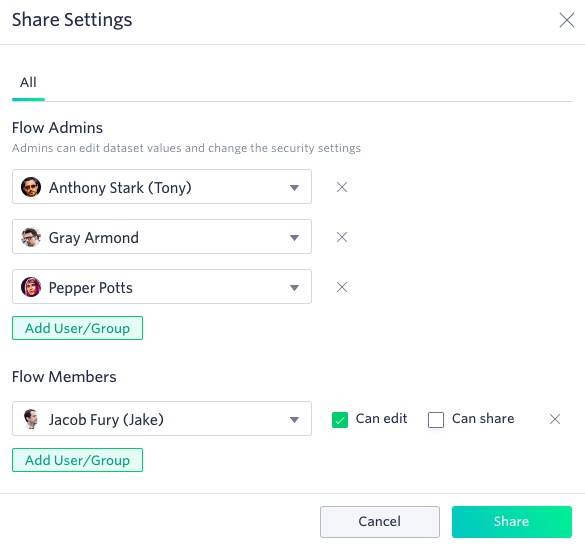
In the section called Flow Admins, select other administrators. Dataset Admins can edit values, change the settings, and delete the dataset.
In the section called Flow Members, select the people who can view the values in the dataset. You can additionally assign permissions to edit the values or share the dataset with users or groups.
Dataset security settings
The security settings define what flows can look up values in your dataset.
To change your dataset security settings, click the More options button ( ) and then Dataset settings.
Flows
By default, all flows will be able to look up the values in your dataset. Change this by selecting the second option and specifying which flows you want to grant access to. To remove a flow, click the Remove button next to the flow name. Click Save when finished.
Fields
You can also protect some fields in your dataset from being looked up. If you want to protect a field, select the second option and choose the fields which are safe to be looked up. All other fields will be inaccessible to flows. To remove a field, click the Remove button next to the field name. Click Save when finished.
Dataset history
Kissflow records actions performed on your dataset. To view your dataset history, click the More options button ( ) and then Dataset history.
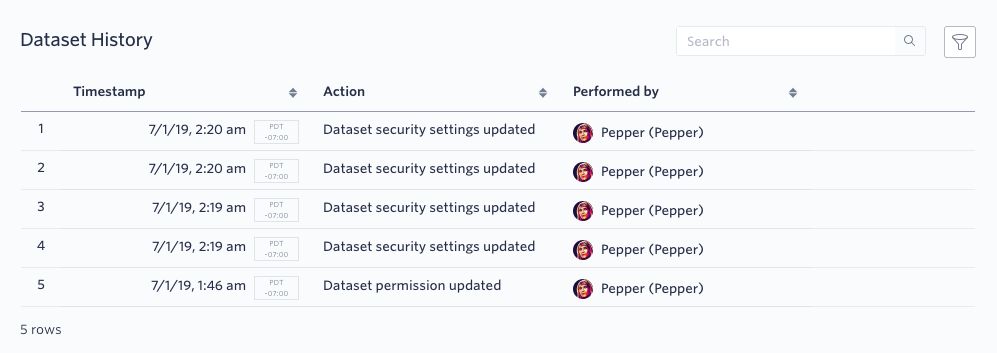
The dataset history shows:
- Timestamp - Displays the exact time on which an action was performed.
- Action - Displays what kind of action took place. Some of the actions are: dataset permission change, field modified (specifies that the field was modified but doesn’t display the values), or dataset security settings updated.
- Performed by - Displays the name of the person who performed the action.
- Request ID - Displays a unique Request ID for every action that takes place. This can be used for support purposes.
Additionally, you can search, and filter fields in your dataset history.
Duplicating a dataset
- Click the More options button ().
- Click Duplicate dataset.
- The default name of the new dataset is Copy of <original dataset name>. You can change the name.
- Select if you want the new dataset to have the same values and views
- Click Duplicate.
Deleting a dataset
- Click the More options button ().
- Click Delete dataset.
- Kissflow will check to see if you are using this dataset in any flows. If you are, you will be shown those dependencies.
- If there no dependencies or you have removed them all, click Delete.