Setting up SCIM with Okta
Modified 5 years ago
Abhiram
Kissflow supports automatic user provisioning with System for Cross-domain Identity Management (SCIM) standard. Okta’s SCIM-based user provisioning for Kissflow supports the following features:
- Creating users
- Updating select user attributes
- Deactivating users
- Pushing groups to Kissflow
When provisioning users, Okta directory is mapped to a single Kissflow account. Any new user in Okta will receive an email invitation prompting them to create a Kissflow account.
Configuring user provisioning to Kissflow
To set up Kissflow user provisioning with Okta, you need to have an Account Owner, Super Admin, or User Admin role and an active Okta account.
- Go to your Okta Admin account, access the applications tab and click the Add Application button. Then, search for the SCIM 2.0 Test App (OAuth Bearer Token) application and rename the app accordingly.
- In Kissflow, go to Admin and open the User Management screen. Click Configure SCIM button, copy the SCIM Base URL and generate a new SCIM token. Select Save to finish provisioning setup on the Kissflow side.You must keep the SCIM token secure as the token once generated will not be available again for copy or download.

- Under the Provisioning tab of Okta SCIM app, paste the copied Base URL and Secret token into their corresponding fields. Then, click Test API Credentials to verify the app. If successful, save the credentials.
- You can click Edit beside Provisioning to App to enable Create Users, Update User Attributes, and Deactivate Users capabilities.
- Next, go to Assignments tab of the app. Click the Assign dropdown button to assign the app to more people or groups in your Okta account.
- When the user and group assignment is complete, these users and groups are added to Kissflow. Separate groups won't be created, only the users who're part of these groups get added to Kissflow.
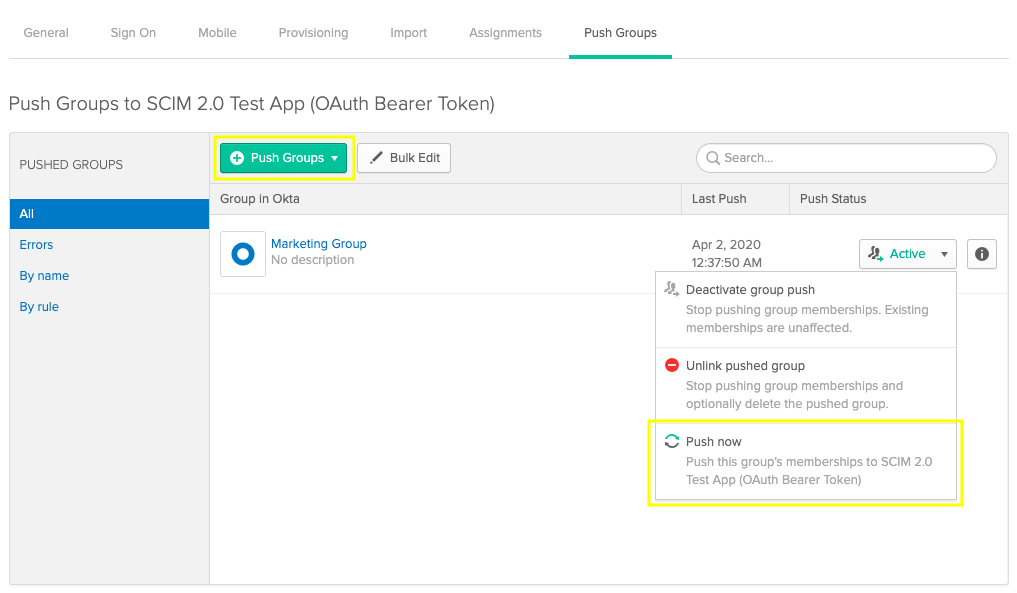
- You can also Push groups to sync your Okta group and its users with Kissflow. Note that each time you push a group, the group gets created in Kissflow. However, only those members of the group who are already a part of Kissflow will be assigned to the group.


New users synced from Okta are added in an active state by default. When you delete someone in Okta, they are retained in Kissflow as an inactive user.
Mapping custom parameters
To map custom parameters in Okta with custom fields added in Kissflow user management table,
- Go to Provisioning tab in Okta app, under Profile Attributes & Mapping > User Attributes, click the Edit Attributes button. You'll be redirected to the Profile Editor screen.
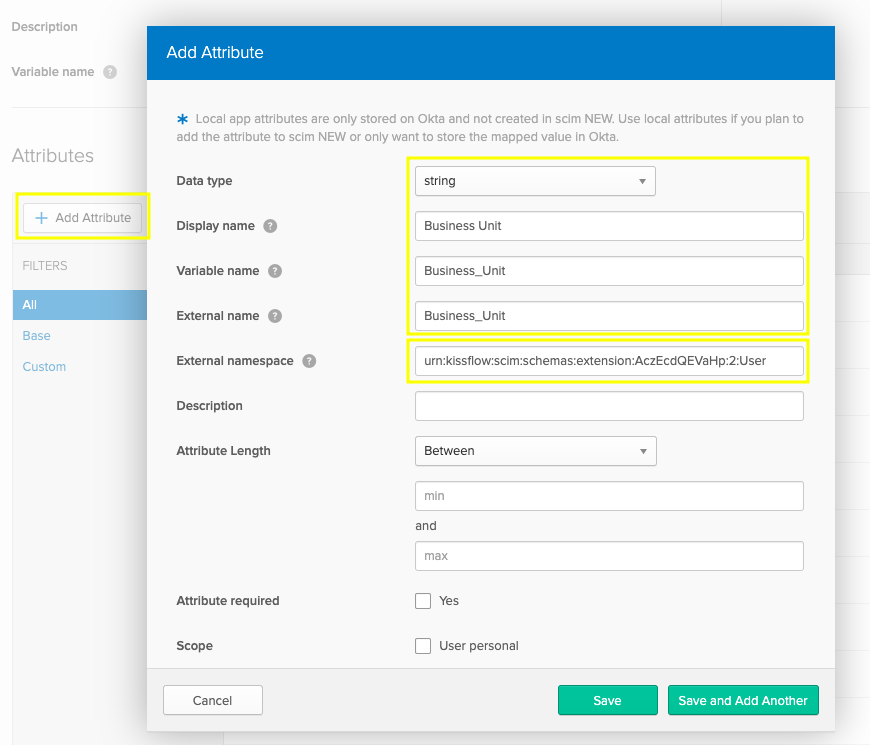
- Here, you can Add Attribute. Enter relevant data in the following fields based on the Kissflow field that you created.
- Data type: Select your Kissflow field type here. Data type can be number, string, integer, boolean, and more.
- Display name: Human readable label when attribute appears in the UI.
- Variable name: The variable name is used to refer to the attribute in profile mappings and expressions. Enter your relevant Kissflow Field ID here.
- External namespace: The external namespace is used to refer to the namespace in the external system. You can paste the below Kissflow custom schema extension.
urn:kissflow:scim:schemas:extension:Kissflow Account ID:2:UserIn the schema extension shown above, replace the highlighted text with your actual Kissflow Account ID.
- Click Save. You'll find the newly created attribute listed at the bottom of the screen.
- You can remap your custom attributes by accessing Provisioning tab > Profile Attributes & Mappings > Edit Attributes Mappings.
Once the parameter mapping is complete, every time a new user or group is added in Okta, the custom mapped attribute value also gets synced with Kissflow.