Making a process workflow
Your workflow is the set of steps that must be completed to finish an item. The workflow in a process shows the path for the data in the most ideal situation and also allows for alternate conditions and flows.
Starting a workflow
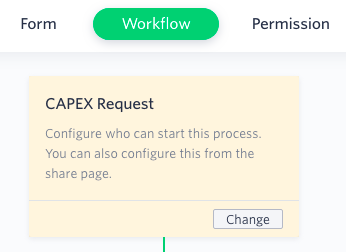
In processes, you create the workflow in the second step of the editor.

The first step says Configure who can start this process. By default, only the Flow Admin can start the process. If you click Change, a popup will appear that lets you choose other Flow Admins and also individual users or groups who can initiate items. You can also configure this from Share settings.
Now, you can add the steps for the workflow. You can add as many steps you want. To add a workflow step, click the Add button ( ), and then Add a new step, Add a parallel branch or Add a goto.
Adding a new step

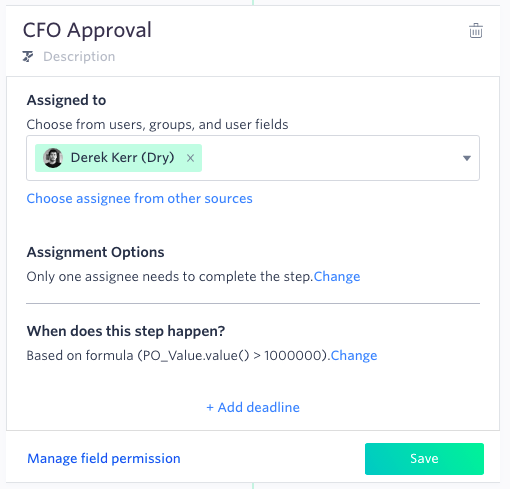
Workflow steps are human tasks required to process the item. Enter a name and description for the step. Step names can be a maximum of 100 characters. You can add rich text descriptions including images and video by clicking the Text formatting button (). These descriptions show on the form in the run time.
Next, choose whom to assign the task to. It can be a specific user, a group, or a user field in your form. If you click Choose assignee from other sources, you can choose Add by User Filter, Add by Dataset, or Add by Formula. Under Assignment Options, the default assignment option is that only one user needs to approve the item. Click here for more information on assignment methods.
Under When does this step happen?, you can add conditions to only allow the step to happen in certain conditions.
Steps do not have deadlines by default. To add one, click +Add deadline. Learn how to set and modify deadline for a step.
If you click Manage field permission, you’ll be able to see what fields are editable, read-only, and hidden at that step. Click here to know more.
Adding a parallel branch

Parallel branches serve two use cases. One is when you want two or more steps to happen at the same time. Each branch moves forward independent of what is happening in the other branches. For example, many of the steps in employee onboarding can happen simultaneously and they aren't dependent on other steps to finish first. However, the workflow will not proceed further until all of the branches have finished. Learn more about simultaneous tasks.
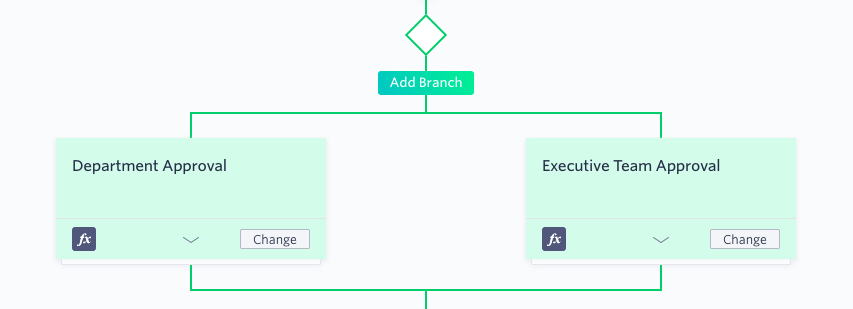
The second use case is to create two separate branches that are dependent on data in the form. If certain data is triggered, the item goes down one side. If not, it goes down the other. To configure this, click Change on the branch and then write the condition for when that branch should happen.
When you add a branch, you first give the entire branch a name. Then you can click the Add Button ( ) to add steps to that branch. Steps in the branch can be collapsed or expanded by clicking the arrow button next to Change.
Click here to know when to use all assignees option vs parallel branch.
Adding a goto

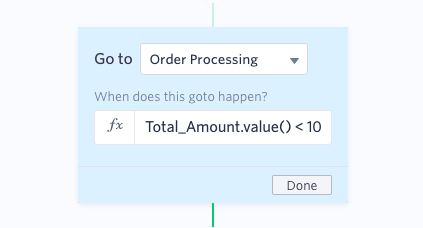
A goto allows you to hop between workflow steps when certain conditions are met. You can jump forward or backward within the workflow steps. For example, if someone is filling out a travel request, but doesn’t require hotel accommodations, plane tickets, or a travel advance, you can skip other steps and go straight to a final approval.
To configure the goto, enter the conditions under which it should fire and then name of the step the item should go to.
