Group management
Modified 5 years ago
Abhiram
Account Owners, Super Admins, and User Admins can create and manage groups to streamline administration and access to flows. You can use groups to assign workflow steps, share flows, and more.
Creating groups
Go to Admin > Group Management, then click Create Group to build a new user group. In the popup box, enter a name for the group and choose the users. You can add groups you’ve already created. When you are finished, click Save to create the group.

Editing and deleting groups
To update a particular group, click the Edit button (

Identifying which groups a user is in
You can view all the groups a user belongs to by going to the User Management tab and finding the Groups column.
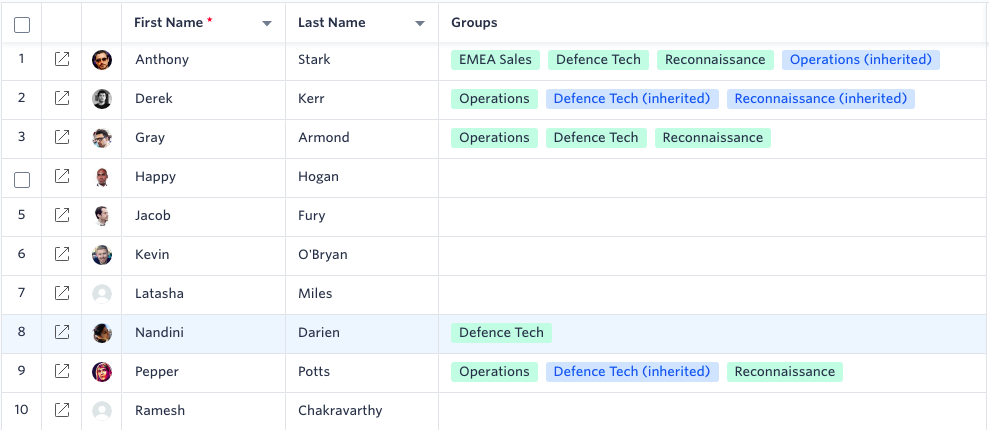
In addition to seeing the active groups a user is a part of (in green), you can also see the inherited groups (in blue).
In an inherited group, a user indirectly becomes a part of the group when one of their groups is added to another one.
For example, in the above image, Pepper is part of the group Operations. That entire group was added as a part of Defense Tech. So, Pepper is also a part of Defense Tech, but she will be removed if her group is removed.
The Everyone group
Every Kissflow account comes with a system-generated group called Everyone. All current users are automatically added as members. When you add new users, they are automatically added to the Everyone group. Users cannot be removed from this group, and this group cannot be edited or deleted. To share a flow with the entire organization, share it with the Everyone group.