Setting up SCIM with OneLogin
Modified 3 years ago
Abhiram
Account Owners, Super Admins, and User Admins have the ability to manage SCIM-based user provisioning with OneLogin.
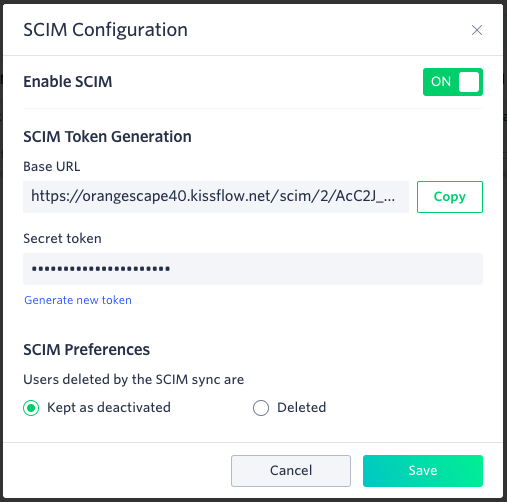
Start by turning on SCIM in Kissflow:
- Navigate to Admin > User Management and click Configure SCIM.
- Generate a SCIM token, copy the SCIM Base URL and SCIM token to the clipboard. You will need to paste these into OneLogin.You must keep the SCIM token secure as the token once generated will not be available again for copy or download.

Creating SCIM app in OneLogin
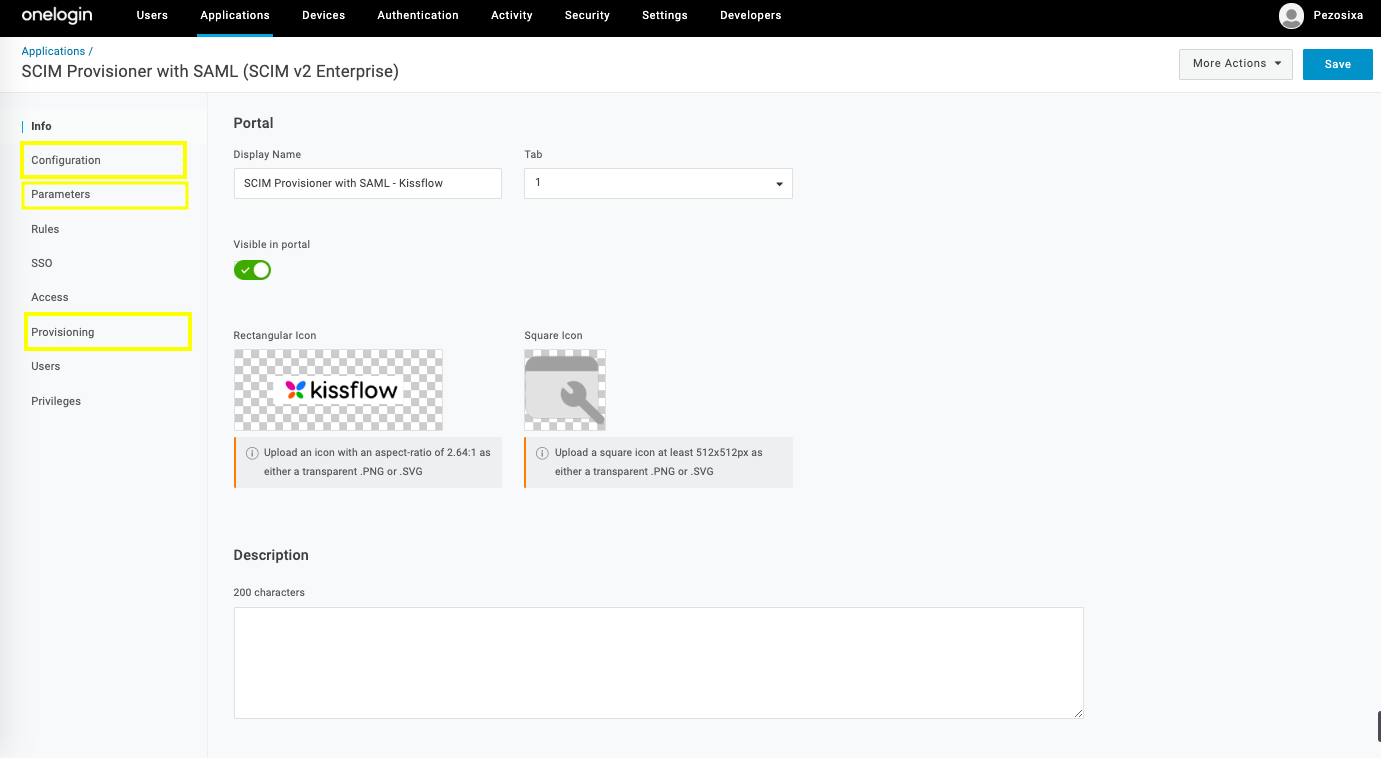
Sign into your OneLogin account as an Administrator. Navigate to the Applications tab and select Applications. Search for and select SCIM Provisioner with SAML (SCIM v2 Enterprise), depending on your schema needs. Give your SCIM app a display name value that will help you recognize it and click Save.
Configuring and connecting your SCIM app to Kissflow
- Select the Configuration tab.
- Enter your Kissflow account domain in the SAML Audience URL field.
- Provide your SCIM Base URL value. This is the address that points OneLogin to the Kissflow account.
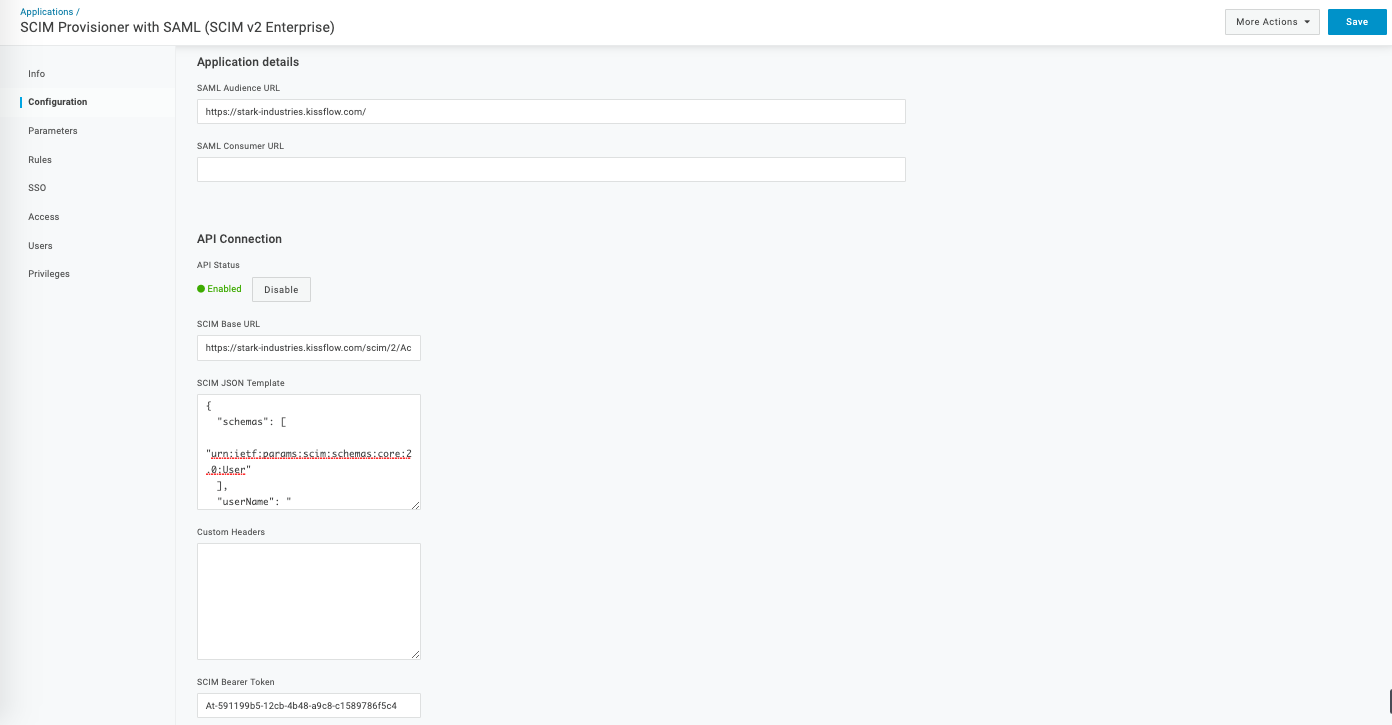
- Next, provide the SCIM JSON Template value for Kissflow. The default SCIM schema supports the attributes: userName, name, emails, title, and Department. To sync manager data and any other custom attributes, you will need to use the Kissflow account specific schema extension provided below. You can copy and use this template.
{
  "schemas": [
    "urn:ietf:params:scim:schemas:core:2.0:User"
  ],
  "userName": "{$parameters.scimusername}",
  "name": {
    "familyName": "{$user.lastname}",
    "givenName": "{$user.firstname}",
    "formatted": "{$user.display_name}"
  },
  "emails": [{
    "value": "{$user.email}",
    "type": "work",
    "primary": true
  }],
  "title": "{$parameters.title}",
  "Department": "{$parameters.department}",
  "urn:kissflow:scim:schemas:extension:Kissflow Account ID:2:User":{
    "Manager": {
      "value": "{$parameters.external_manager_id}",
      "displayName": "{$user.manager_firstname} {$user.manager_lastname}"
    }
  }
}
In the schema extension shown above, replace the highlighted text with your actual Kissflow Account ID. - Provide your SCIM Bearer Token value. This token authenticates requests and responses sent between the OneLogin SCIM provisioning service and your Kissflow account.
- Click Enable to allow the SCIM app to make an initial connection to the SCIM base URL defined by you.
This initial connection does not invoke any actual provisioning and just makes a GET request for a user value that OneLogin knows does not exist. If the request receives a 404 status code as a response, it confirms that the endpoint is valid and the API Status displays as Enabled. - Click Save.
Mapping parameters
- Select the Parameters tab.
- Click the SAML NameID (Subject) to change the value to Email.
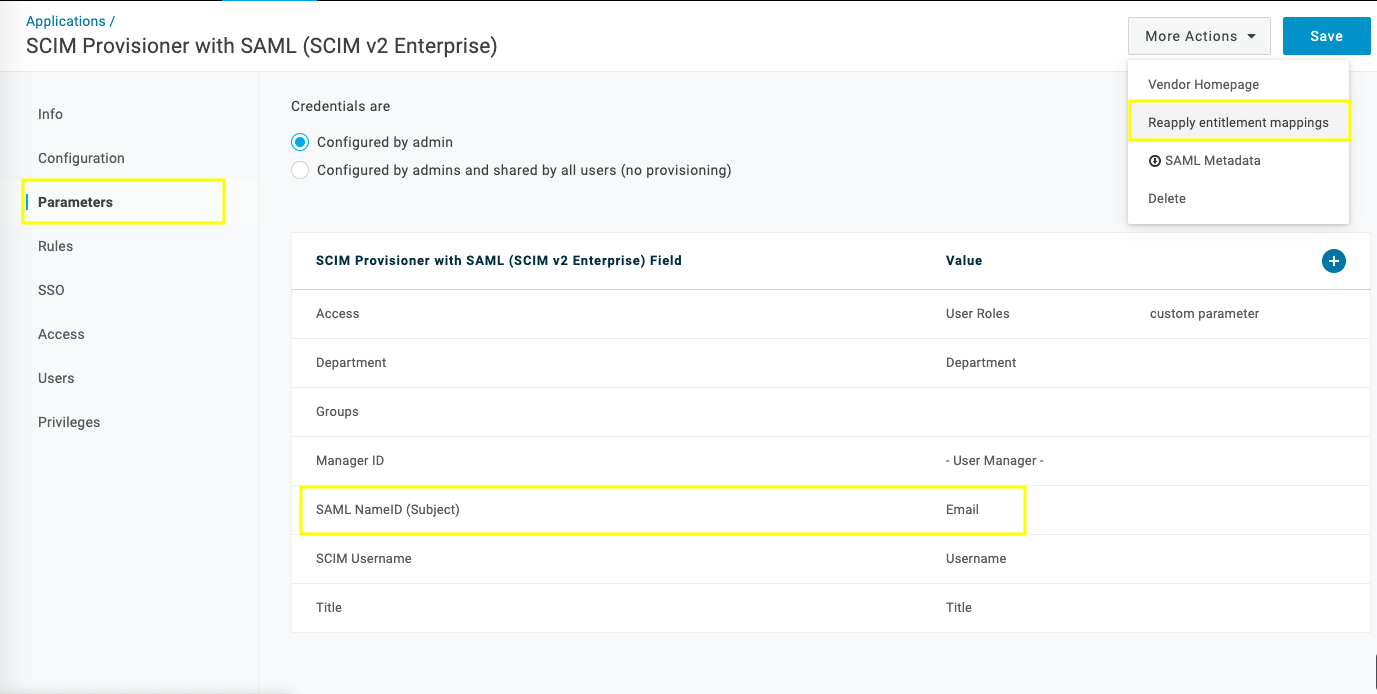
- After successfully mapping your parameter value, click Save.
- Finally, click More Actions > Reapply entitlement mappings.
Provisioning settings
- Go to the Provisioning tab and select the checkbox next to Enable provisioning.
- Based on your need, select or deselect the boxes next to Create user, Delete user, and Update user.
- Under Entitlements, click Refresh. This will prompt OneLogin to import your organization's app entitlement values so you can map them to OneLogin attribute values.
- Click Save, then click More Actions > Reapply entitlement mappings.
- Navigate back to Kissflow SCIM configuration dialog box to enable SCIM.

You can manually associate your OneLogin users to the SCIM app from the Users tab in OneLogin.
New users synced from OneLogin are added in an active state by default. Based on your Kissflow SCIM preference, when you delete someone in OneLogin, they are either deleted from Kissflow or retained in an inactive state.