User profiles and settings
Accessing user profiles
Your profile
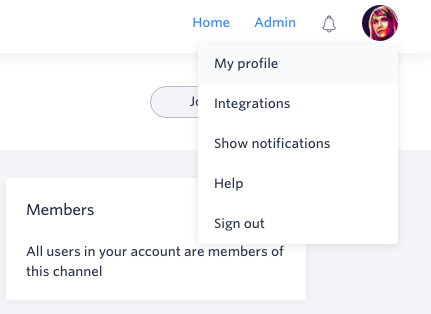
To access your user profile screen, click your profile picture from the Home screen and then click My profile.

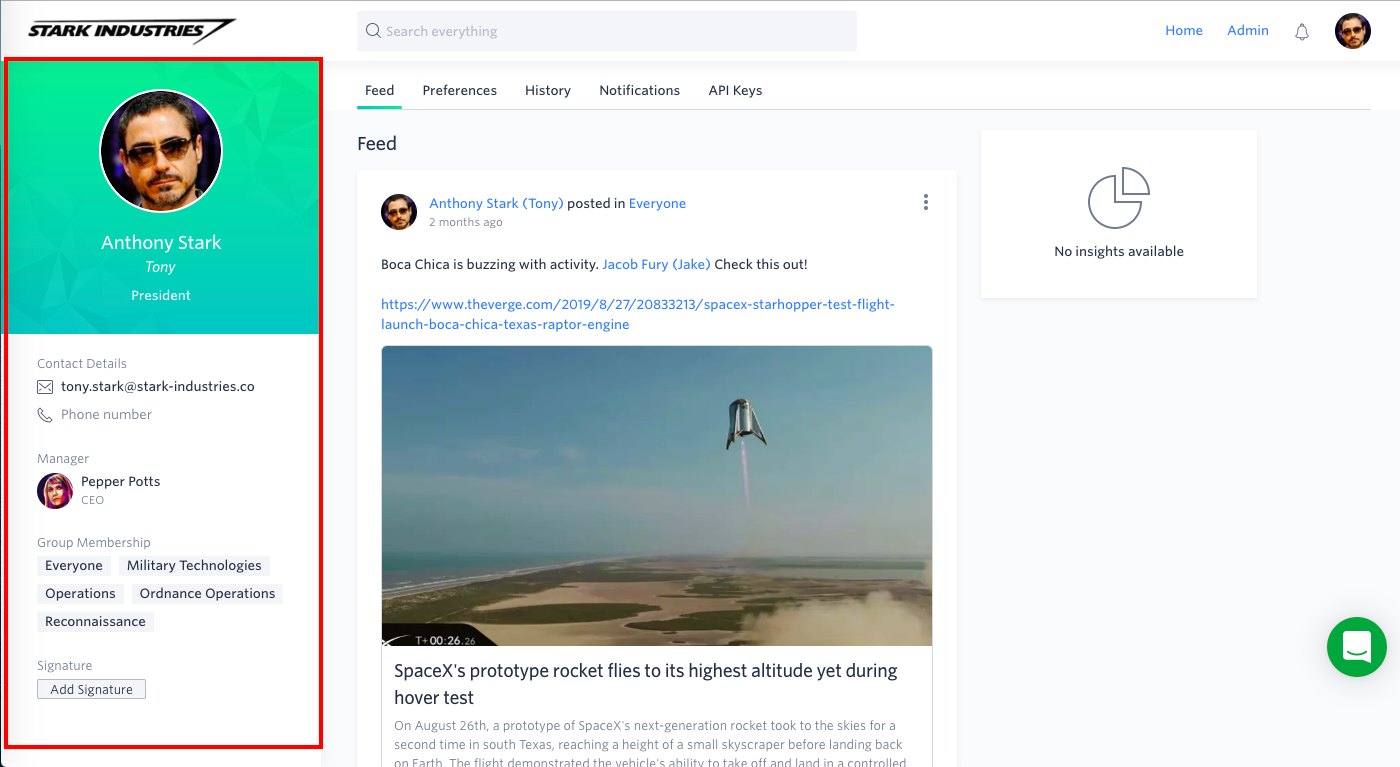
You can see your user data on the left side. At the top, there are tabs for Feed, Preferences, Notifications, History, and API Keys.

Others' profile
You can view another user’s profile by clicking on their name in a post or searching for them. You can see their user data and the Feed. Super Admins can see and edit user data and view user activity.
Updating user data
The user data includes the profile picture, name, nickname, designation, contact details, manager name, and signature. Depending on the settings controlled by Super Admins and User Admins, you can edit these details on your own.
To update your profile picture, click inside the current profile picture box and import an image in .jpeg, .jpg or .jpe format.

To update your user details, simply click the Edit button (), enter the new data and then click the Approve button (
). If you change your email address, you may be required to receive a new sign in email before you can access your account.
Any data that is updated inside the user profile screen is instantly updated in the User Management table.
You will see a list of groups you are a part of. Only a Super Admin or User Admin can change group membership.
To add your signature, click the Edit button (), manually draw your signature using the cursor, and click the Approve button (
). You can also import an image of your signature.
Feed
The Feed shows all your channel posts. You can perform any action on your post from here.
Preferences

Format settings
You can control the default settings that impact how data is formatted and displayed in your account. These settings only affect your individual account and do not affect the entire account's format settings.
Locale. Choose the region that best matches your organization. This will adjust the formatting of the number, date, and currency fields to best match with your area.
Time zone. The time zone of your organization is taken into consideration when you configure a scheduled action for an integration or include a deadline in a workflow. All flow data will be matched to your time zone.
Language. Choose the language for your Kissflow platform. Kissflow is currently offered in English, French, Spanish, German, Italian, Russian, and Portuguese.
When you are done updating your selection, click Save.
Task delegation
If you are going to be unavailable for a certain length of time, you can delegate process tasks automatically assigned to you to another user. All existing tasks will stay with you. You can cancel the delegation at any time.
To enable task delegation, select a user under Who do you want to delegate your tasks to?, and select a start and end date when you want your tasks to be delegated to the user. When you click Revoke, you will be automatically assigned with new tasks. However, all previously delegated steps will still be delegated to the same user.
Active sessions
You can view a list of all active web and mobile sessions during the last 24 hours. You can click Sign out from all active sessions to concurrently sign out from all your sessions. You can also click Sign out to sign out from a specific session.
History
The History tab gives an audit log of all the actions performed by that user. Data in this section cannot be edited.
History gives the following information:
- Timestamp: Displays the exact time when an action was performed.
- Category: Displays the category to which the flow or admin action has been mapped to.
- Flow: Displays the name of the flow.
- Action: Displays what kind of flow or admin action took place. Examples include Project installed, Post added, Integration deleted, New case version published, Account ownership transferred, User activated, etc.
Additionally, you can search, sort, and filter fields in the history table.
