User management overview
Modified 5 years ago
Abhiram
Screen layout
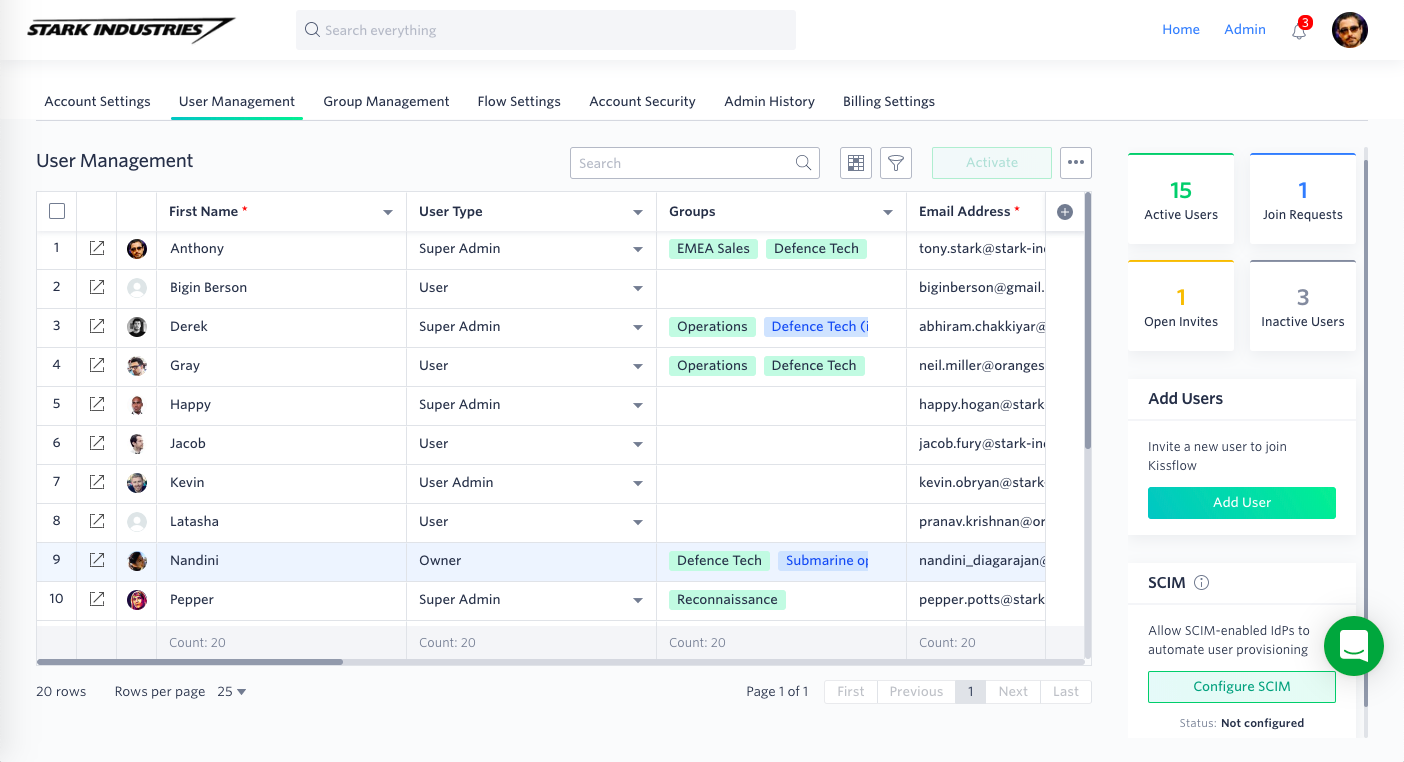
Owners, Super Admins, and User Admins have access to User Management tab under the Admin screen, which gives an overview of all the users in the organization.
On the right side are tiles that act as a quick filter and give a glance of:
- Active Users: Verified users who are actively using a license.
- Inactive Users: Users who do not have an active license, but whose data is still in the account.
- Join Requests: Users who have requested to join the account via the shared sign up URL.
- Open Invites: Invited users who have not verified their account.
In the table, you’ll see a list of all the users, including standard fields for:
- Contact information
- Groups they are a part of
- Reporting manager
- User type
...and many other fields. You can add custom fields here as well, similar to how you add fields to a dataset.
You can make changes to any user by clicking the values in the table. By clicking the Open item button (
From the User Management tab, you can perform actions like adding users, deleting users, transferring account ownership, configuring SCIM-based user provisioning, controlling how many users are shown on the screen, and much more.
Using search and filters
When you click the tiles on the right side of the screen, these act as quick filters to sort users in the table by their status. You can also find desired values within the User Management table using the search and filter features. These are particularly useful when you have a large number of users or when it becomes harder to find specific values from the table.
Search. You can enter any keyword in the search box to find relevant results from the table.
Filters. You can get desired values from the table by setting up filters. To enable a filter, click the Filters button (
Showing and hiding fields
You can decide which fields to show and hide in the User Management table. Click the Show or hide fields button (
Working with user fields
As an Account Owner or Super Admin, you can create new fields in the table. Click the Add button ( ) next to the last column to add a new field. By clicking the Expand button (▼) next to the title field name header, you can customize these fields or hide and delete the particular field. You can also select the sort order based on which values in the table will be sorted.
You can extend specific field permissions in the User Management table to restrict the visibility and usage of these fields during computations. There are three permission settings:
- Protected: When enabled, this field cannot be looked up by any flow created inside your account.
- Visible in user profile: The values in the field will be visible to all users of the account through the user’s profile page.
- Editable by users: Users will be allowed to update their field values through their profile page.