Adding and managing users
Modified 5 years ago
Abhiram
Account Owners, Super Admins, and User Admins have the ability to add, edit, and delete users from your Kissflow account.
Adding users manually
If you want to quickly add a few users, go to the User Management tab in the Admin screen.
- Click Add User.
- You’ll see a popup box where you can enter details about the user:
- The First name and Email address are mandatory.
- The Nickname will display the user’s name like this: Anthony Stark (Tony).
- You can associate the user to a preconfigured group. Learn how to create a group.
- You can choose to associate the user to a manager which can be used in step assignments.
- When finished, you can click Add to create a user in your account. You can alternatively click Add & New to submit this form and open up a new popup box for an additional user.
User provisioning with SCIM
You can configure SCIM to enable automatic user provisioning with identity providers (IdPs):
Inviting users
When you invite someone to join your account, they will get an invitation email sent to the address you entered. If the user accepts the invitation and your account has enough user licenses, you can manually assign an active license to the user. To do this, select the checkbox of the user and click Activate. The user count is automatically updated in the Active Users tile. However, if the account doesn’t have enough licenses, the user will be added to the account in an inactive state and won’t be allowed to sign in.
Editing user data
If you want to change a value in the User Management table, click the cell that you want to update and edit the value directly. Values are automatically saved.
If you update the email address, the user must first verify the new email address before they can access their Kissflow account again. You can click the Resend button to resend an invite email to the user.
For dropdown fields such as User Role and Manager, click the Expand button (▼) and choose the preferred user role and manager respectively from the dropdown. Only Account Owners and Super Admins can make another user a Super Admin.
Deactivating and activating users
Deactivating users remove them from an active license but keeps all of their data in the system. If you deactivate or delete a user, all flow items assigned to that user need to be reassigned by the Flow Admin. If the deactivated or deleted user is the Flow Admin, a Super Admin can select a new Flow Admin.
To deactivate a user, select the checkbox beside the user and then click Deactivate. Once a user is deactivated, the count is automatically updated in the Inactive Users tile. Inactive users are not allowed to sign in until their license is reactivated.
The Account Owner cannot be deactivated; ownership must first be transferred to someone else.
To activate an inactive user, select the checkbox of the user and click Activate. The user count is automatically updated in the Active Users tile.
Deleting users
Deleting users removes them from your account. When you delete users, you lose all the data associated with them.
To delete a user, select the checkbox by their name. Then, click the More options button (
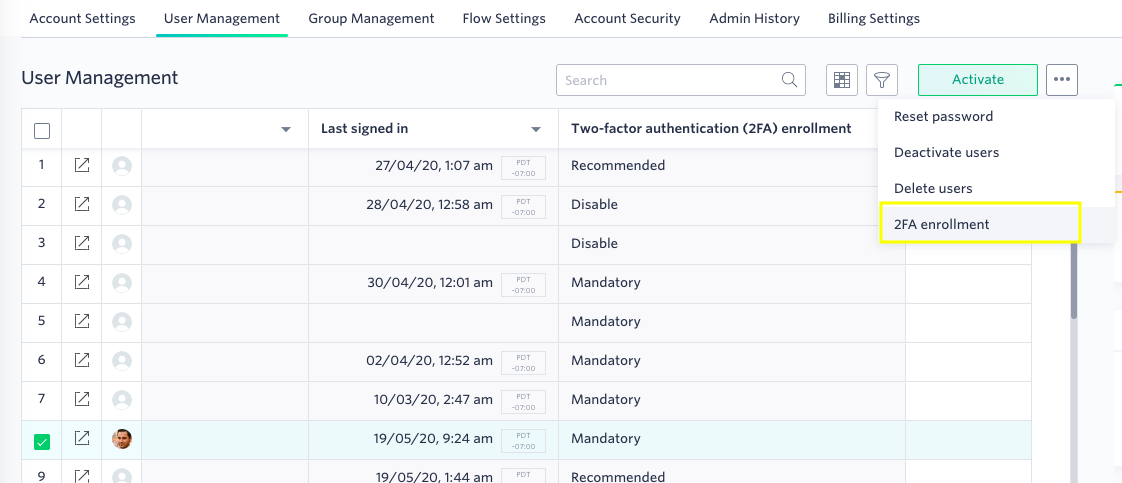
Two-factor authentication (2FA) enrollment
Two-factor authentication (2FA) provides an additional layer of security to your Kissflow account by requiring more than just a password to sign in. As an Account Admin, you can enroll multiple users in your account for 2FA. This feature is only available in enterprise plan.
Here're are the different 2FA enrollments:
- Recommended: Users can decide whether to turn on or off 2FA for their account.
- Mandatory: This 2FA enrollment makes 2FA mandatory for signing in.
- Disabled: This is the default 2FA enrollment. 2FA will not be available for such users.
Resetting a password
To request a user to reset a password, select the user and then click the More options button and then Reset password. Your users will receive a password reset link via email which they can use to reset their account password.