Creating and configuring a view
Views are a helpful way to share but also control stored data. For example, you may have an employee dataset that includes a lot of confidential information. Perhaps a marketing team manager wants to access information related to marketing employees. Rather than sharing all employee details, you can create a view named Marketing that only shares data for those employees.
Creating a view
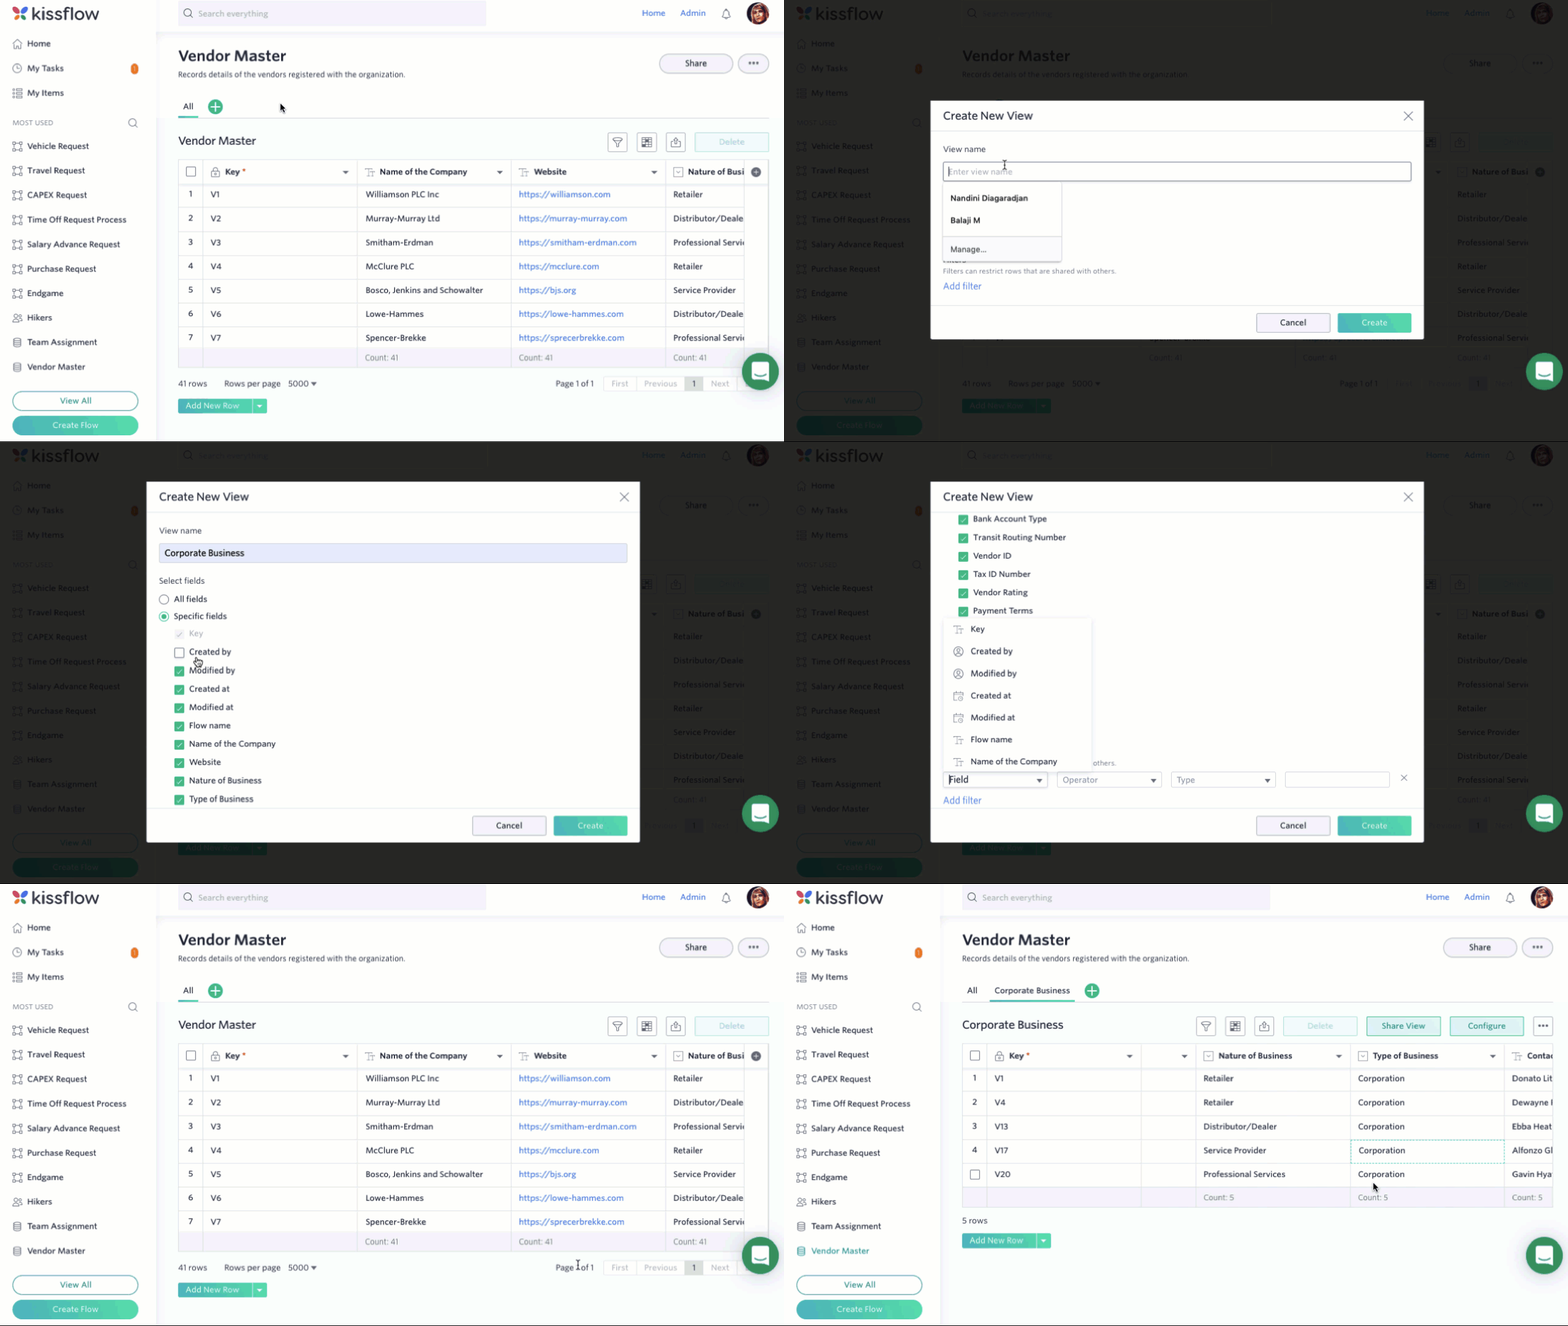
Only Dataset Admins can create new views. To create a new view, click the Add button ( ) next to the All tab. Enter the view name, and select which fields you want to be included in the new view. Create any filters as required.

If you want to make changes to a view, click Configure. From here you can change the name, fields shown, and filters.
All changes to values made in one view are reflected in all other views for that dataset.
Sharing a view
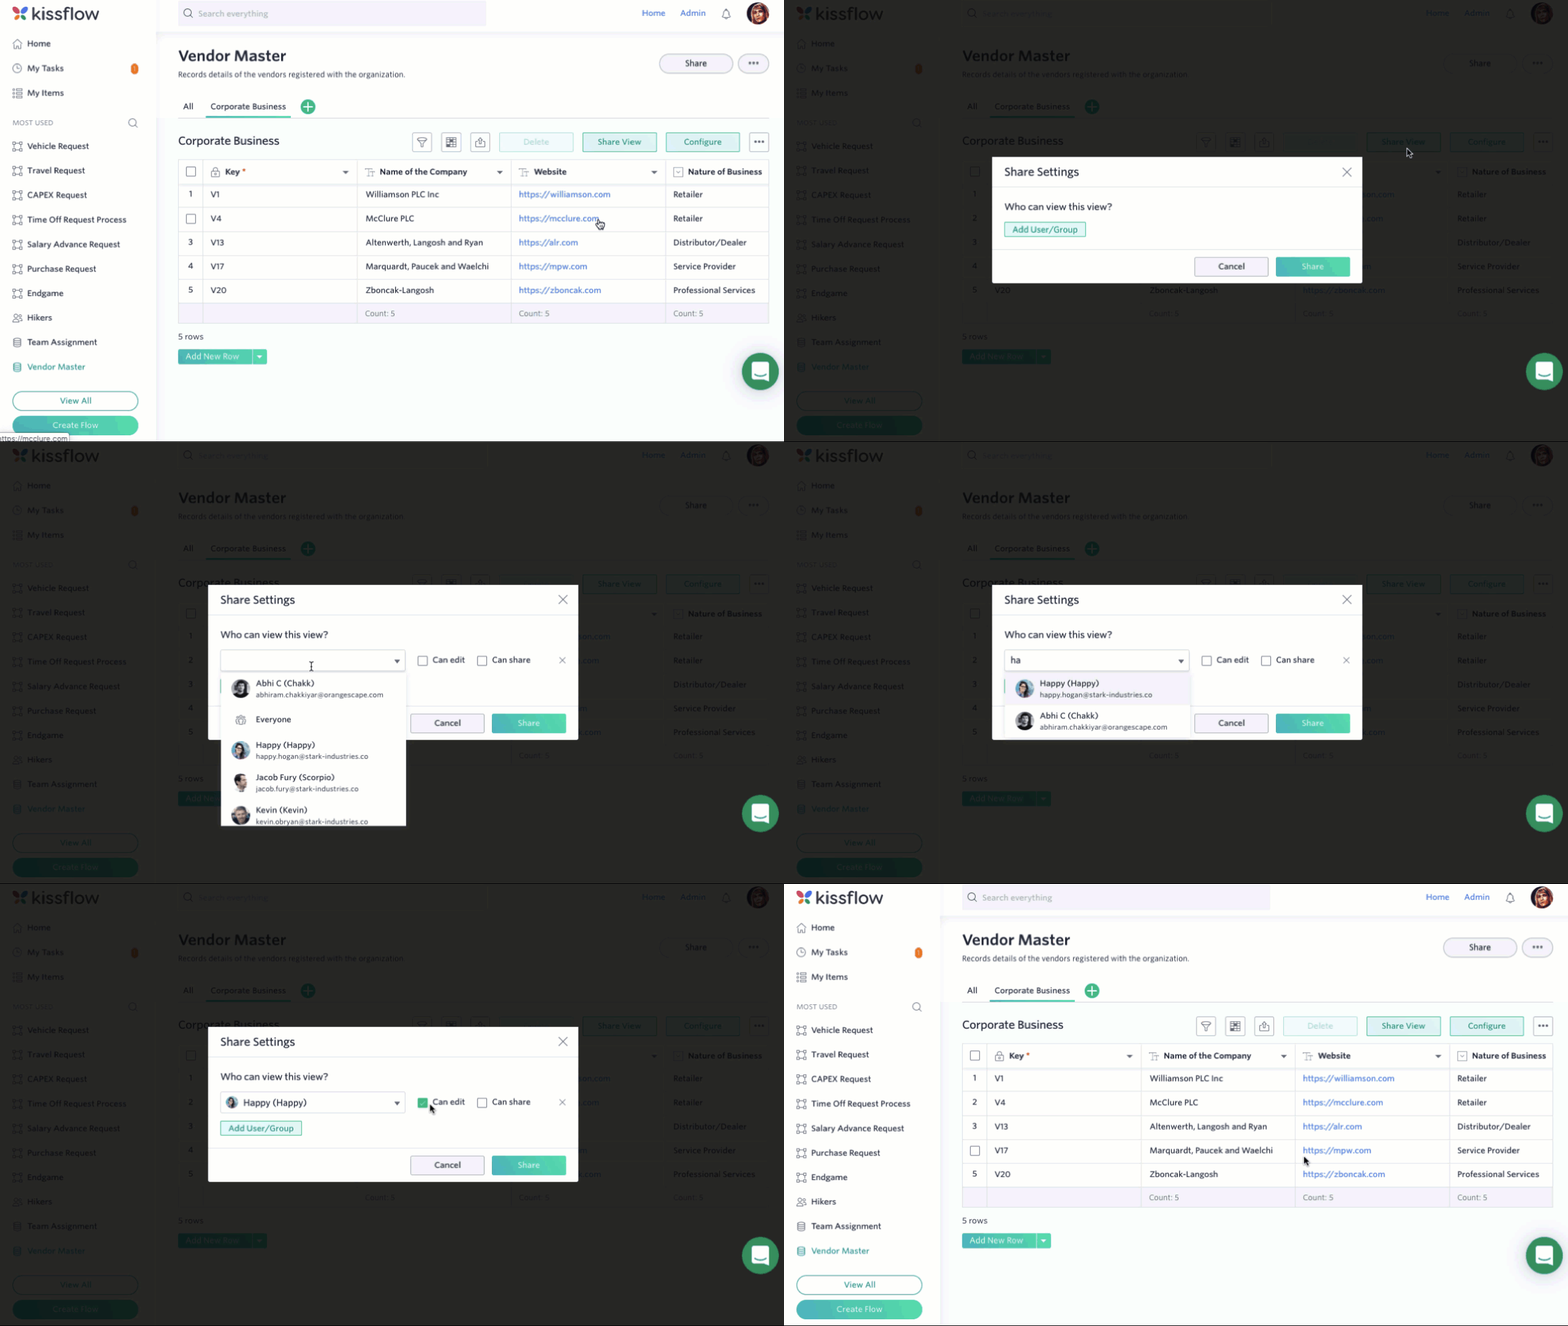
To share the view you created, click the Share View button
In the section called Who can view this view?, you can select the users or groups who can view the values in the view. You can additionally assign permissions to edit the values or share the view with others.

