Using a project board
Modified 5 years ago
Abhiram
Accessing projects
To view a project you have access to, use the Search everything box at the top of the screen, or click View All in the sidebar. You can also bookmark the URL to your project and create a shortcut.
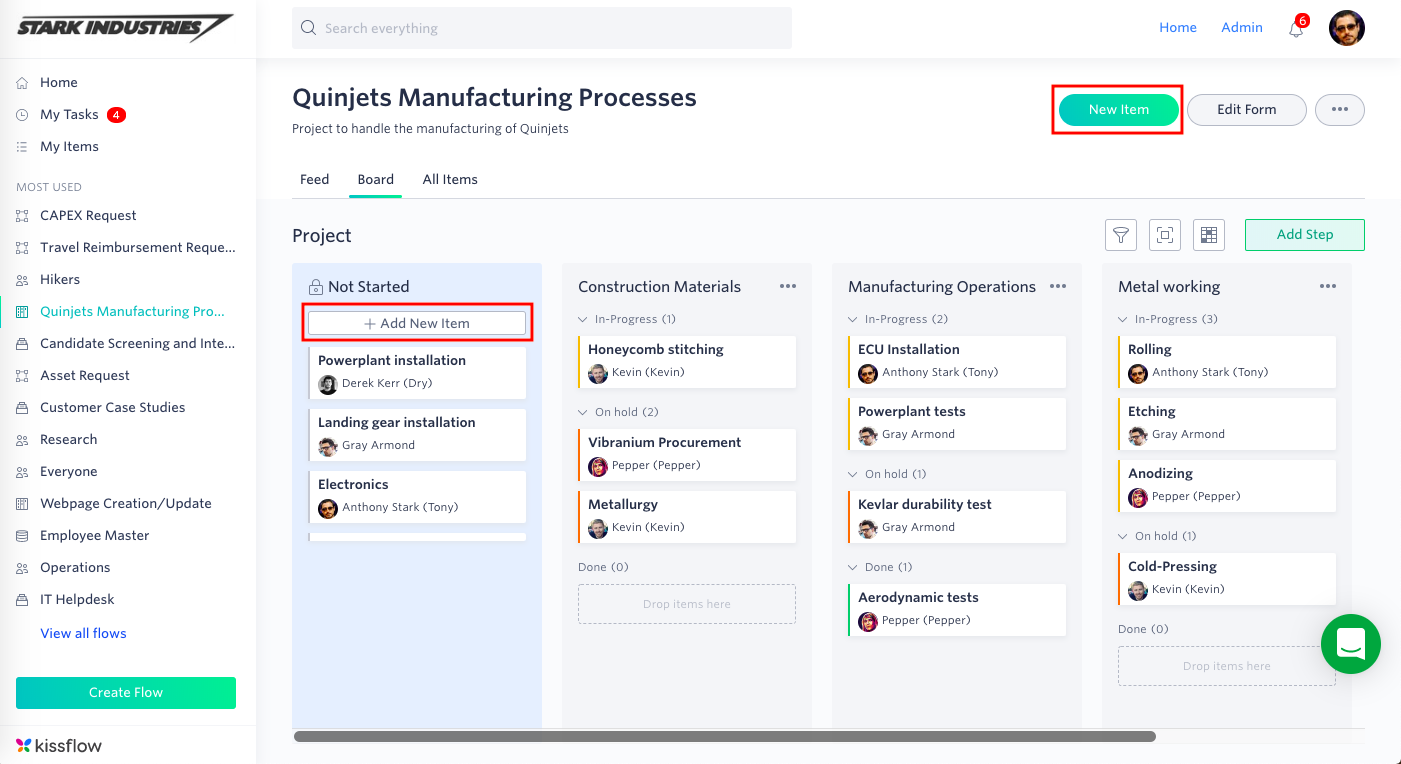
Starting a new item
To create a new item in the project, click New Item on the top right corner of the screen. A new form will open and you can add values to the fields and then click Save and Close.
Alternatively, on the Board tab, find the Not Started step, and click Add New Item.
All new items will immediately be added to the Not Started step.
Project layouts
All projects have three layouts to choose from: Feed, Board, and All Items.
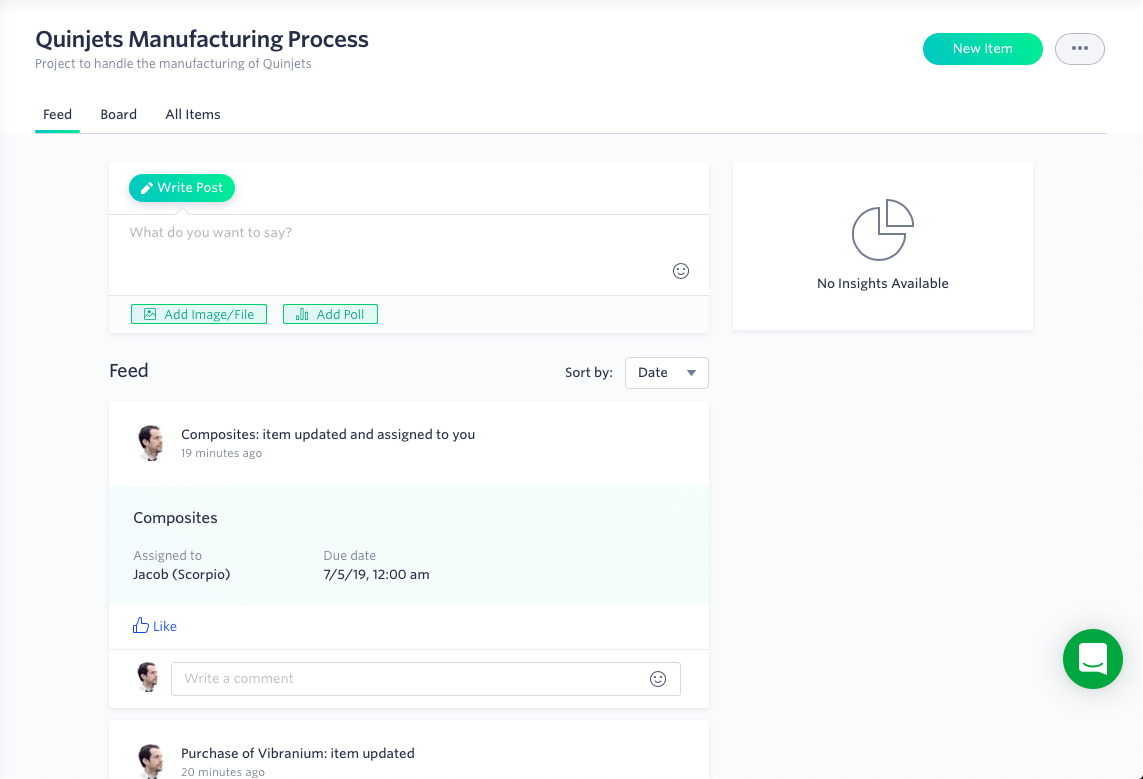
Feed layout
The feed lets members of the project collaborate and shows the latest updates about the items. All flow members can create or comment on posts. Flow Admins can make announcements. New feed cards are added to the feed each time an update is made to an item. Use an @ mention to tag others. Feed cards can be sorted by date or relevance.
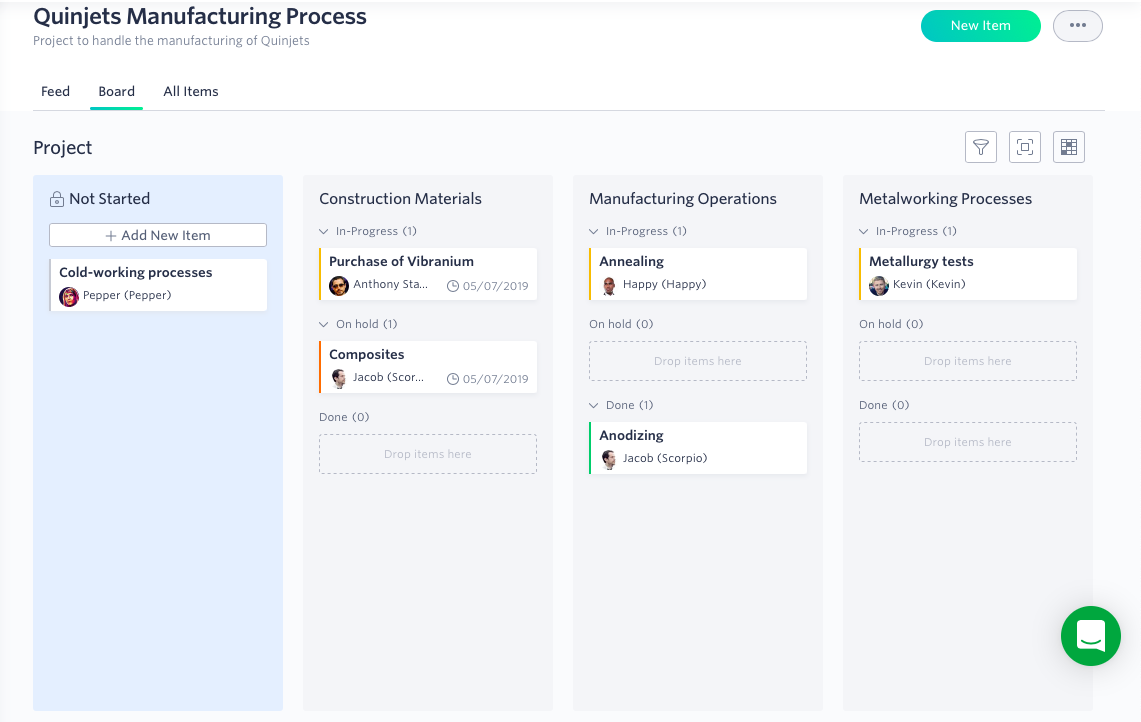
Board layout
The board gives you a visual layout of the project. Items appear as cards and steps appear as columns. Drag and drop items to different steps or states. Click on an item to change values in the form or reassign it.
Board options
Filters (
Fullscreen (
Show/hide fields (
States within a step
Project steps have three states:
- In progress means the item is currently being worked on. For the best reporting, it is recommended to only keep one item in this state per person.
- On hold means items that are either pending to be done, or are waiting on more input before they can be finished.
- Done are items that are finished and ready to be taken to the next step. When items move into this state, they are unassigned from the last assignee. It should be manually assigned to a new member when it goes to the next step.
Archiving items
Archiving the item will remove it from the board to clear up space, but the data is still kept in All Items. To archive an item from the Board tab, click the Archive item button (
Completing items
When you drag an item to the completed step, it is finished and will be marked as Unassigned. You can leave items in this step as long as you want, or archive them to clear them from the board, but maintain their data.
All Items layout
The All Items tab is a great way to see all your items in a tabular display and also perform bulk actions that you can’t do from the board layout. Click the Open item button (
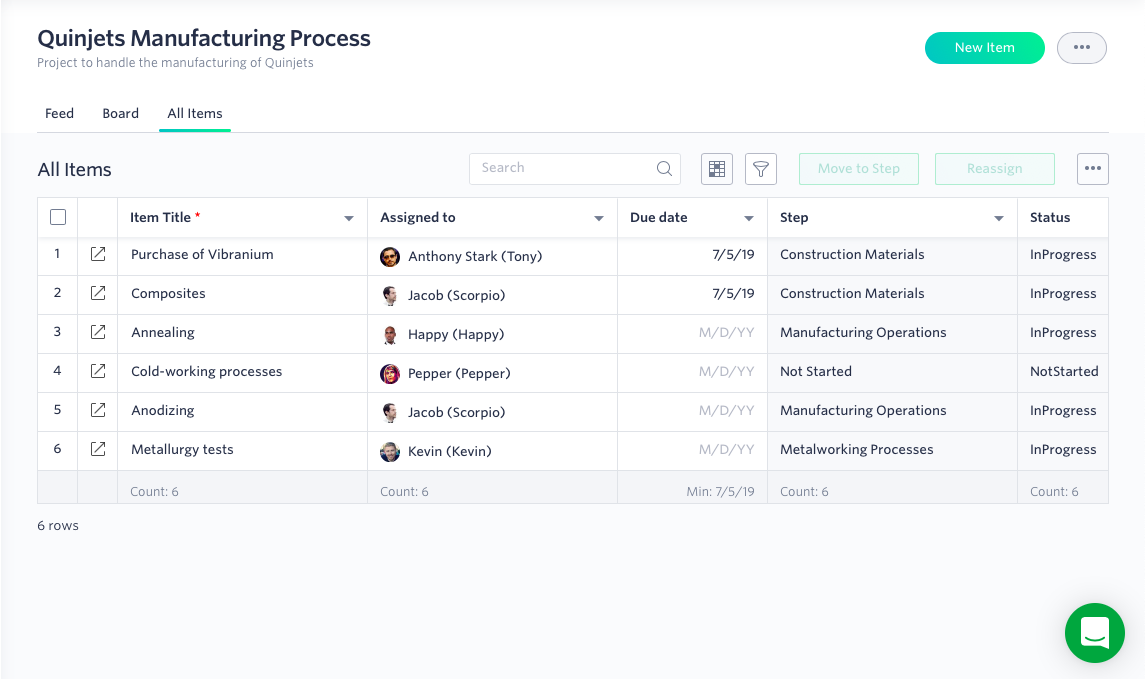
All Items options
Search. Enter any word in the search box to find relevant items in the table.
Show/hide fields (
Filters (
Bulk actions
By selecting the checkboxes next to items, you can perform the following bulk actions to items. Click the More options button (
- Move to Step. A popup box will let you move the selected items to a particular step and state.
- Reassign. A popup box will let you reassign the items to a member of the project.
- Archive. This removes items from the Board, but maintains their data.
- Delete. This removes all of the data about the selected items permanently.
Unarchiving items
If you have items you want to unarchive, select the checkbox beside them and click Move to Step to choose where you want to move the item to.
Notification preferences
Notifications let you know the latest activity on the project. By default, you will be notified about all the activities that take place in the project.
To change the project notification, click the More options button (
- Everything - You will be notified about all the activities that happen in the project.
- Relevant - Kissflow will learn which notifications you click and will tailor notifications to your usage pattern.
- Action items - You will be notified only when something requires your action.
- Nothing - You will not receive any notifications.
You can also set your notifications for all flows from the My Profile page.