Setting up a Send Data integration
Modified 5 years ago
Abhiram
Flow Admins or a users with permission to edit a process can create integration connectors to send data from your process to other internal flows or third-party apps. An integration consists of a trigger that starts a series of actions.
Creating a Send Data integration
- In your process, click the More options button (
) > Integrations
- Click New Integration, then add a name and description for your integration and click Create.
- Under Send Data, click Start New.
Setting up integration triggers
There are two types of triggers: process triggers or step triggers. Process triggers happen regardless of the step the item is in. Step triggers only happen at particular steps in the workflow.
Process triggers
Process trigger event | Description |
When an item is created | Fires as soon as someone clicks New Item |
When an item advances to the next step (New) | Fires only when any item advances to the next step in the workflow. This won't fire every time an assignee approves the item at any step. |
When an item is rejected | Fires when any item is rejected at any step |
When an item is withdrawn | Fires when the initiator withdraws an item at any step |
When an item crosses its deadline | Fires when any item breaches its deadline at any step |
When an item is reassigned | Fires when any item is reassigned at any step |
When an item is sent back | Fires when any item is sent back to a previous step |
When an item completes the workflow | Fires when an item reaches the end of the workflow |
Step triggers
To set up a step trigger, you must first choose a step from your workflow.
Step trigger event | Description |
When an item enters this step | Fires when an item enters this step |
When an item exits this step | Fires when the item
|
When an item is approved by an assignee at this step (New) | Fires every time any assignee approves an item at this step |
When an item is rejected by an assignee at this step (New) | Fires every time any assignee rejects an item at this step |
When an item crosses its deadline at this step | Fires when an item crosses the deadline at this step |
When an item is reassigned at this step | Fires when an item is reassigned to another assignee at this step |
When an item is rejected at this step (Deprecated) | |
When an item is withdrawn at this step (Deprecated) | |
When an item is sent back at this step (Deprecated) |
Creating the integration workflow
After setting up the trigger, click the Add button (

Adding actions
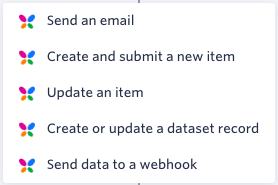
There are five types of actions you can perform in an integration.
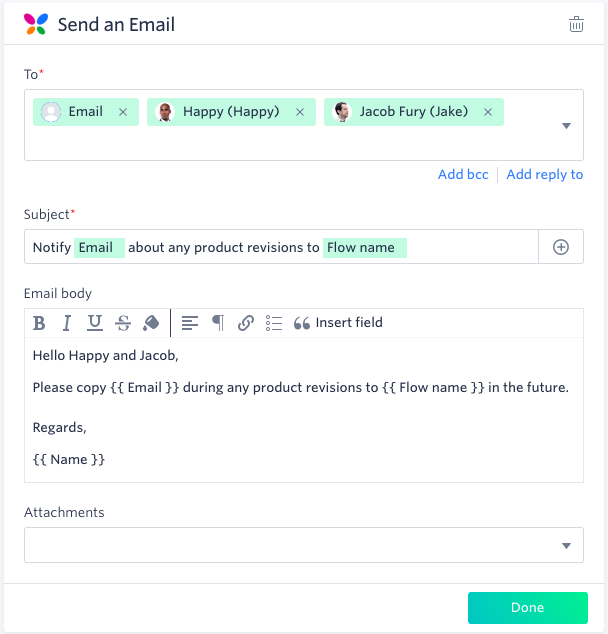
Send an email
This action sends an email to specific users.
- The To, Bcc, and Reply to fields will pull up any users in your system and email fields in your form. The email field lets you send data to someone outside your organization account. Additionally, you can enter email addresses in these fields.
- All emails will come from the address admin [at] accounts.kissflow.com. If you want replies to go to a different address, enter it into the Reply to field.
- The Subject field can either have static text, or include data from your form by clicking the Add button (
- The Email body can include any kind of formatting you want. You can also include form data, including email fields by clicking Insert field.
- The Attachments field will show any attachment fields you’ve configured in your form. Note that the maximum size of the attached file can be 10 MB.
Create and submit a new item
This action creates and submits a new item in a process. Start by selecting the name of the flow you want to initiate.
On the left side you will see a dropdown of possible fields in the process you want to initiate. On the right side, you can choose which fields in your current process to map to the new one. You can map fields as well as tables, but the mapped fields must be of the same field type.
When the trigger fires, this integration will take the data you have mapped and create and submit a new item into the workflow.

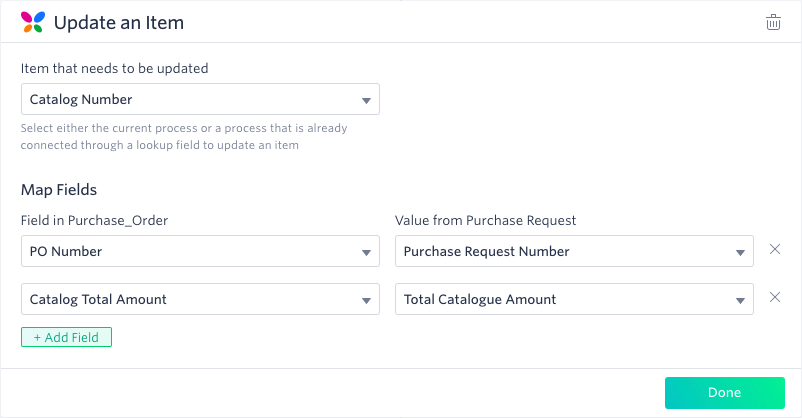
Update an item
This action will allow you to select the same process or find an item in a different process and update its values. To update another process, you must have a valid lookup field in your form that refers to that process. Start by selecting the same process or a lookup field in the process. If the source and target fields are in the same process, then map multiple form fields of similar field types. Else, you can map multiple form fields in your current process to similar field types in your target process. When your trigger operation is successfully executed, values from your current process item fields get automatically updated to mapped fields in the target process item.
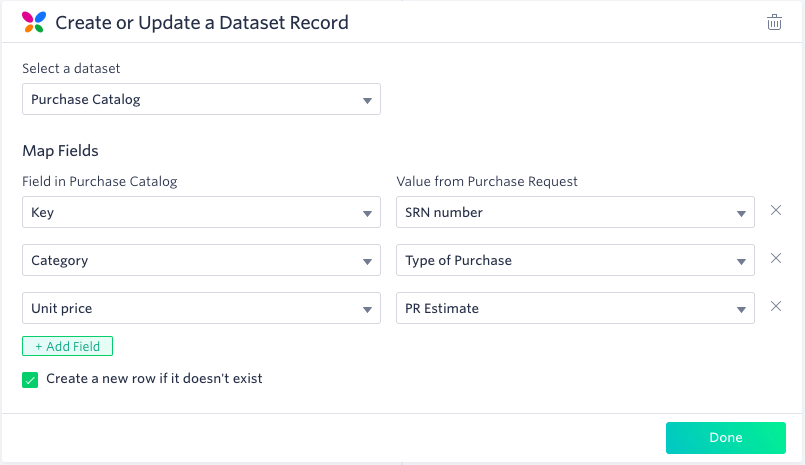
Create or update a dataset record
This action lets you create a new row or update an existing record in a dataset based on the values from your process. For example, once a new item is approved to purchase, you can add it to your purchasing catalogue dataset.
You must always map the Key field in a dataset with a text field in your process. Also, all the other mapped fields must be of the same field type.
Send data to a webhook
Kissflow can integrate with third-party software through webhooks, or user-defined HTTP callbacks. When the trigger occurs, the webhook will send data to a specified URL in the form of an HTTP request. To set up a webhook, you need to have a URL where the webhook should send the data. Click Send Test Data before saving the integration connector.
Learn how to use webhooks to integrate Kissflow with Zapier

Adding conditions
You may not always want a trigger to lead to an action. You can set up a condition based on data in your form that will define the action depending on if the condition is true or false. You can create multiple conditions and decide if they are AND or OR conditions.
In the workflow, add actions, iterative actions, or additional conditions to specify what happens if the condition is true on the left side and what happens if the condition is false on the right side.

Adding iterations
Iterations are used when you want to take an action for every row in a table. For example, you may want to start a new item in a different process for each row.
Start by selecting the table. Then either select the action you want to take for each row, or create a condition.
