Live forms
A live form is what a user sees when they are acting on an item. In processes, you can view the form by clicking the Open Item button (
Parts of a live form
When you view a live form in a process, it is divided into three panels.
- On the left are the section titles to let you jump to any section
- In the middle is the actual form
- On the right are widgets and comments
At the bottom are all the actions you can take, which are configured by the Flow Admin.
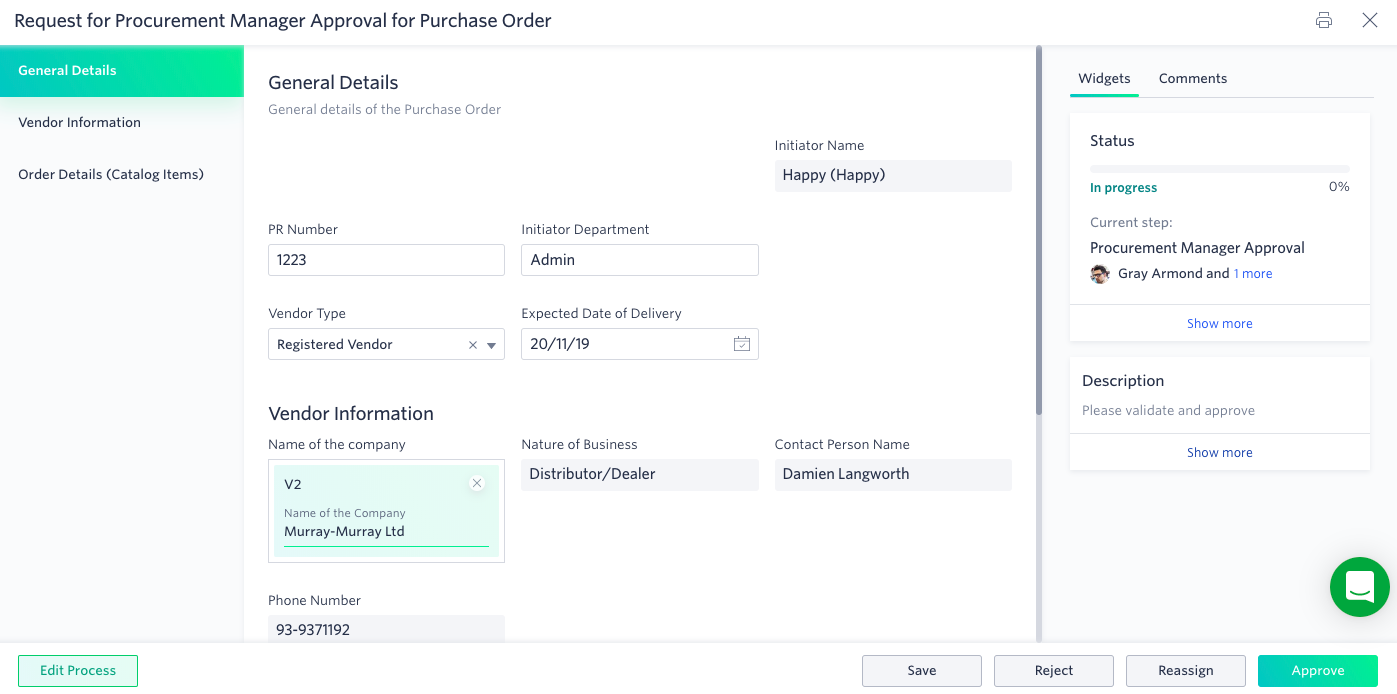
Actual form:
In the middle, you can see the fields, sections, and tables configured in the form. Your permissions, visibility, and appearance settings are in place that control what fields display and which ones are editable.
Tables
Tables show field names as columns and let you add as many rows as you need.
There are four options for users to view tables better.
- Resize the field width by placing the cursor on the edge of the field, clicking it, and dragging it.
- Reorder the fields by dragging and dropping them.
- Pin and unpin fields to the left side so that they are always visible as you scroll horizontally. Click the down arrow at the end of the field name to select this option. If you drag a field into the pinned section, it automatically becomes pinned.
- Dragging it out of the pinned section makes it unpinned.
- Click the Fullscreen button (
 ) to expand the table. Click it again to return to the standard view.
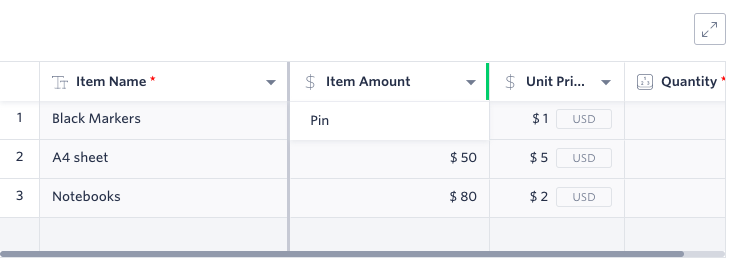
To delete a row, select one or multiple rows by clicking the checkboxes on the left side of the row and then click Delete.
Widgets
Widgets only show for forms in processes. There are two widgets: Status and Description.
Status
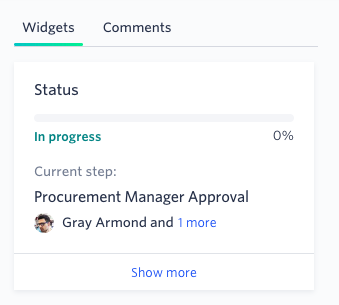
- A bar will show how completed the item is as a percentage.
- The status will be either: In Progress, Draft, Completed, Rejected, or Withdrawn.
- It will show the name of the current step.
- It will show the assignees for this step. If there are more than one assignees, then you can click on the link to display all of them.
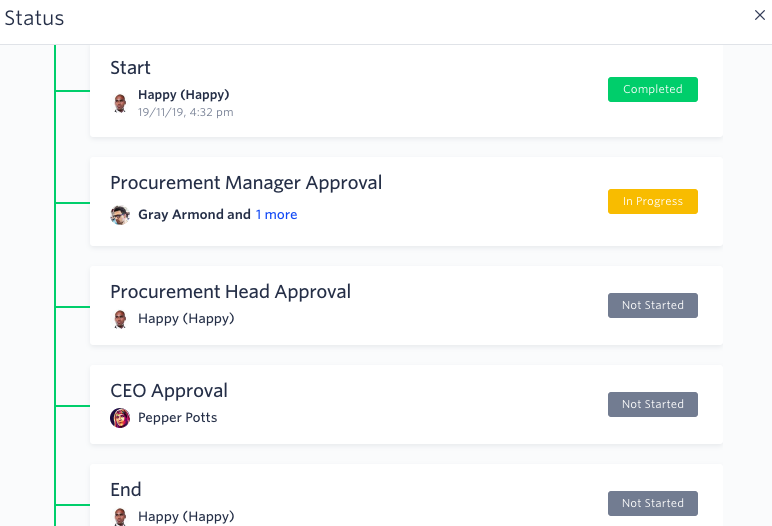
- If you click Show more, you'll see a flow chart of the workflow including the date and time that each step was completed and what steps are yet to be done, along with any notes if the item is sent back or rejected.
Description
The description displays any text entered when creating the step in the workflow editor.
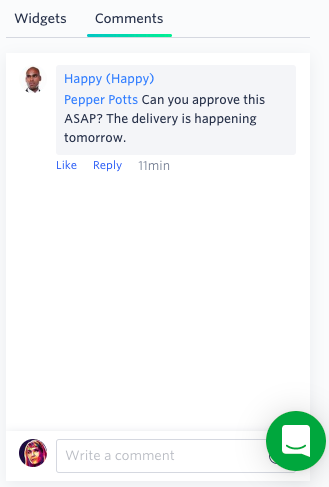
Comments
You can add comments to process, project, and case items. Enter your comments in the Write a comment text box. These comments can also be viewed in the Feed for your flow. You can edit and delete your own comments.