Integrating Kissflow with Zapier
To get the most out of Kissflow, you may need to integrate it with other software. Zapier is a platform that lets you create codeless connections to over 1,000 other cloud software tools.
How Zapier works
In Zapier, you create zaps that are made up of triggers and actions. A trigger is an event that causes a set of actions to take place.
- A trigger inside Kissflow might be an approval or rejection.
- You can also have triggers in other tools to create actions inside Kissflow.
For example, you can set up a zap where every time you approve a step in a Kissflow process (trigger), a meeting is scheduled in Google Calendar (action). Or, every time a new purchase request is raised in your ERP system (trigger), you can start an approval process in Kissflow (action).
Setting up Kissflow triggers
There are currently no native Kissflow triggers inside Zapier. However, you can still set them up using Zapier Webhooks, as long as you are a Flow Admin, or have permission to edit the process.
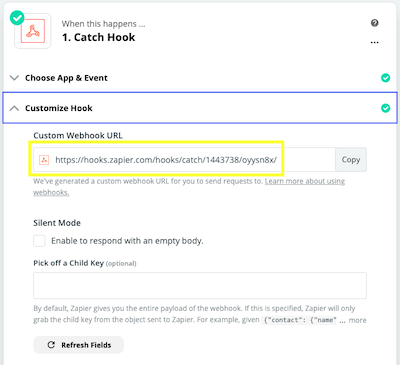
To trigger a zap with an event in Kissflow, open up your Zapier account and create a new zap. For the trigger app, choose Webhooks by Zapier, and then select Catch hook as your default trigger event. A custom webhook URL will be generated, which you’ll need to copy.

Back inside your Kissflow process, follow these steps:
- Click the More options button (
)
- Click Integrations
- Click New Integration
- Name the integration and click Create
- Choose the Send Data option, and click Start New
At this point, you need to decide what kind of trigger you want. A process trigger happens across the entire process, whereas a step trigger only happens at a particular step. If you want a step trigger, select which step. Then, click the dropdown menu to see possible triggers.
After you define your trigger, follow these steps:
- Click the Add button (
)
- Click Add action
- Choose Send data to a webhook
- Paste the URL you got from Zapier into the field URL to call
- Click Send Test Data
- Back in Zapier, confirm that the zap received the correct data
- Click Done
- Click Save & Close
- Change the status of the integration to ON
Whenever this integration takes place, it will send a trigger to Zapier, which will start the zap you set up.
In Zapier, you can complete the zap to show the other steps you want to take place in other software applications.
Setting up Kissflow actions
You can set up a trigger in a different application that causes an action to take place in Kissflow.
In Zapier, start off your zap with the trigger from the other software. Then select Kissflow Digital Workplace as the action app.
Currently, Kissflow only offers one Zapier action: submitting an item into the start of a process workflow. It will take data generated in the other software, populate the form, and submit it into the workflow.
To demonstrate this, let’s use the example where a custom purchase request in Salesforce is your trigger.
- Select Salesforce as your trigger app and New Custom Object as your trigger event.
- Select Kissflow Digital Workplace
 as the action app
 is still active in Zapier. Make sure that you select Kissflow Digital Workplace.
 - Choose the action event: Process - Initiate and Submit an Item.
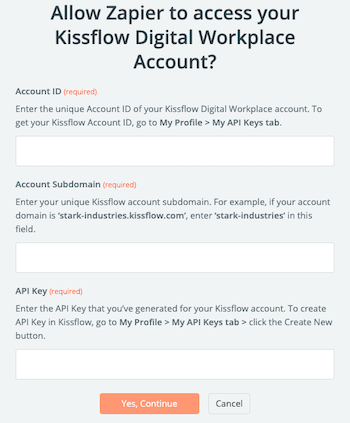
- When you add Kissflow for the first time, you’ll be prompted to enter your Account ID, Account Subdomain and API Key. Your Account ID and API Key can be found in the My Profile page under the My API Keys tab. Your subdomain is just the name of your Kissflow URL that comes before .kissflow.com.

- Select the Kissflow process that you want to link to.
- Click search fields to get all the fields in your Kissflow process. You can optionally map information from your trigger application to the fields in your Kissflow process.
- Once it is set up, make sure the zap is turned ON. Now, every time the trigger event happens, a new item will start in your Kissflow process.
