Editing and managing a dataset
Learn more about who can edit and manage datasets here.
Adding and editing fields
Click the plus button ( ) to add a new field. You can add as many fields as you want to a dataset.
Give the field a name and choose a field type. You can also make fields required, and give a default value. You can also create rules for validation, visibility, and appearance of the field. Learn more about using fields here.
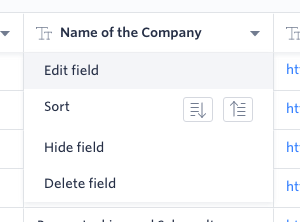
If you want to change a field, click the down arrow (▼) next to the field name and click Edit field. Once you’ve completed your changes, click Done. You cannot change the type of field after you insert values in order to protect the data integrity. If you need to change the type, you’ll need to create a new field and copy+paste the values. A maximum of 5,000 rows can be created or pasted within the dataset. Learn more about data type changes.
Deleting fields
To delete a field, click the down arrow (▼) next to the field name and click Delete field.
If that field is used in a formula in a flow, you will be prompted to remove the dependencies first. After removing the dependencies, you can safely delete the dataset.
Adding and deleting rows
To add a single row, right-click on any row and click Insert 1 row above or Insert 1 row below. Select multiple rows with the checkbox at the left side to add more than 1 row at a particular place in the dataset.

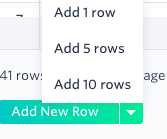
You can bulk add multiple rows to the bottom of your dataset with the Add New Row button. Select Add 1 Row, Add 5 Rows, or Add 10 Rows. If you paste items into the dataset, rows will be automatically created, and you do not need to manually add rows before pasting values.
To delete a row, right-click anywhere on the row and select Delete row(s).
Adding and editing field values
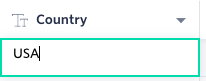
Enter values into your dataset by clicking and typing it into the cell. Some fields such as dropdowns require a double click. Once finished, click Enter or Tab.
You can also copy+paste values from any other spreadsheet. If you copy+paste values, make sure all of your fields and formats match the source file.
All of your information is autosaved in the dataset.
Using filters in datasets
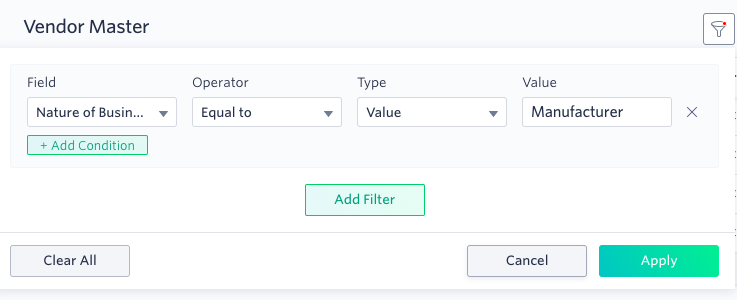
You can add filters based on a condition in a dataset.
To add a filter, click on the Filters icon ( )and then click Add Filter. Choose a Field, Operator, Type, and map a value or a field based on the type. You can also add conditions to limit the values shown.
To remove filter, click on the Filters icon and then click the Remove button next to the condition you want to remove, and then click Apply.
Show or hide dataset fields
You can decide which fields to show and hide in your dataset. Click the Show/hide filter ( )icon. Select which fields you want to see in the dataset. Unselect fields you want to hide. To view all the fields, click Show All. To hide all fields, click Hide All.
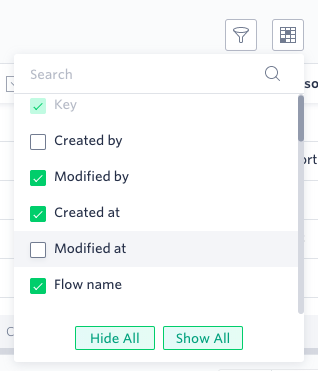
You can also hide a field by clicking on the down arrow next to the field name.
Exporting a dataset
You can easily export all the rows in your dataset to a CSV file. Click the Export icon ( ), and then choose the export option as CSV and click Done.
After a successful export, you will be notified and the exported data will be sent to your email address.
