Administering a process
When you create a process, you become the Flow Admin. Here's more about what a Flow Admin can do in a process.
Share settings
To share the process you created, click the More options button (
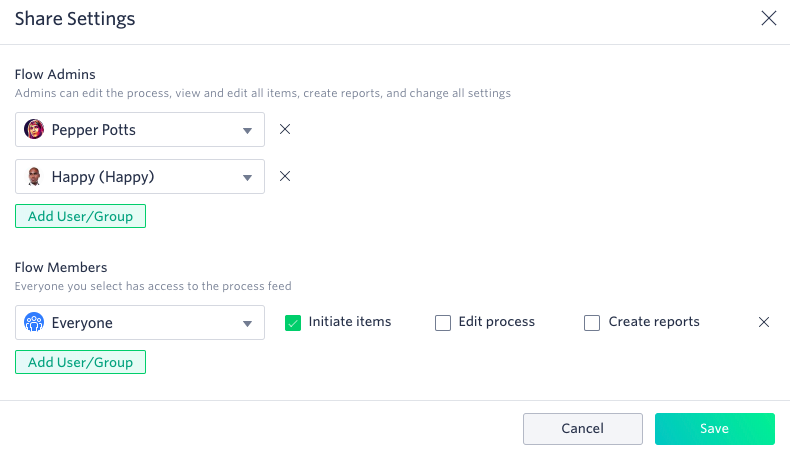
In the section called Flow Admins, you can select other administrators. Flow Admins can edit the process, view and edit all items, create reports, and change all settings.
In the section called Flow Members, you can select the people who can access the process feed. You can additionally assign users or groups permission to initiate items, edit the process, and create reports.
Process settings
To modify the process settings, click the More options button (
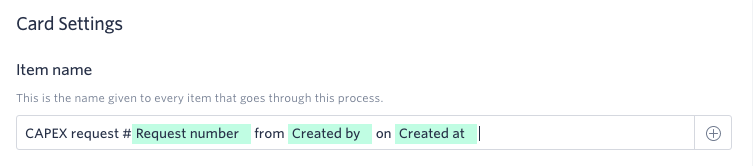
Card settings
Item name
The first thing you can do is change how the Item name appears. The item name is the unique name given to each item as it goes through the workflow. Name each item in such a way that it is easy to distinguish between items. You can make use of form and system fields by clicking the Add button ( ).
).
Card appearance
The item card displays on the process feed whenever there is an update. Here, you can choose the form fields that display on the feed card.
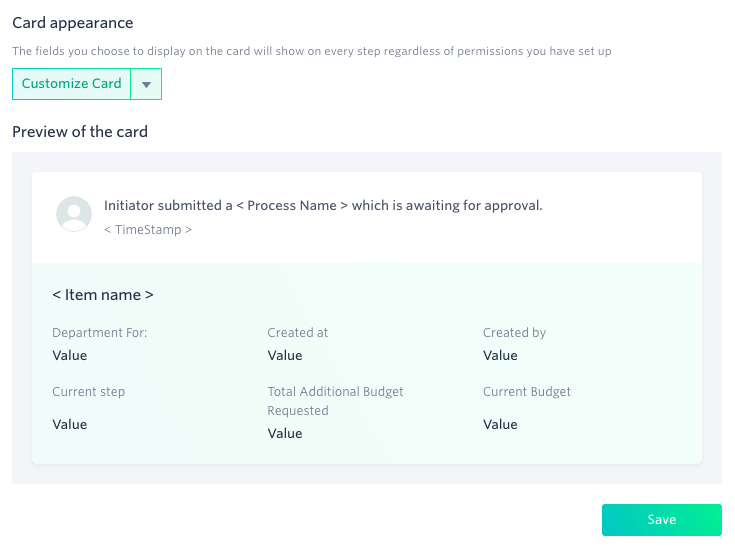
To customize the feed card, under the Card appearance section, click Customize Card. Then select up to six fields to display on the card, and click Apply. You can see a preview of the feed card.
Feed settings
Flow Admins can decide if members of the process can post anonymously on the process feed. By default, this setting is turned off. To enable anonymous posting, go to the Feed Setting section, select the Post anonymous checkbox and click Save.
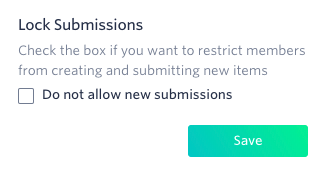
Lock submission
When you are working on the process or making significant changes, you may want to stop members of the process from starting new items. To lock submissions, select the Do not allow new submissions checkbox, and click Save.
After enabling this, members will not be able to initiate new items and nothing will show in the feed. However, items in progress will continue to follow the workflow. Items in draft cannot be submitted until this option is removed.
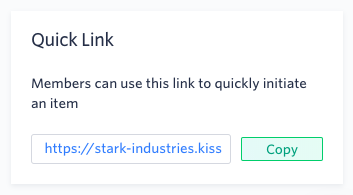
Quick Link
Share this link with members of your process so they can immediately start a new item if they are logged in. If they are not logged in, they will be directed to the login page first.
Process security settings
By default, all other flows in your account are able to find values in your process. If you want to restrict this, select Choose flows that can look up this process and type the flows you want to grant access to the process. To remove a flow, click the Remove button ( ) next to the flow name. Click Save when finished.
You can also restrict which fields are able to be looked up.
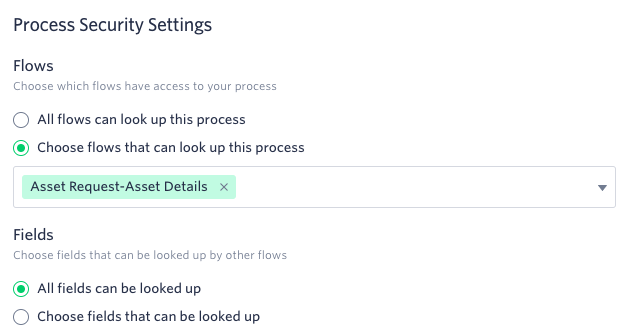
You can also restrict the fields that can be looked up by other flows.
Process history
Kissflow records all actions performed on your process. To view your process history, click the More options button (
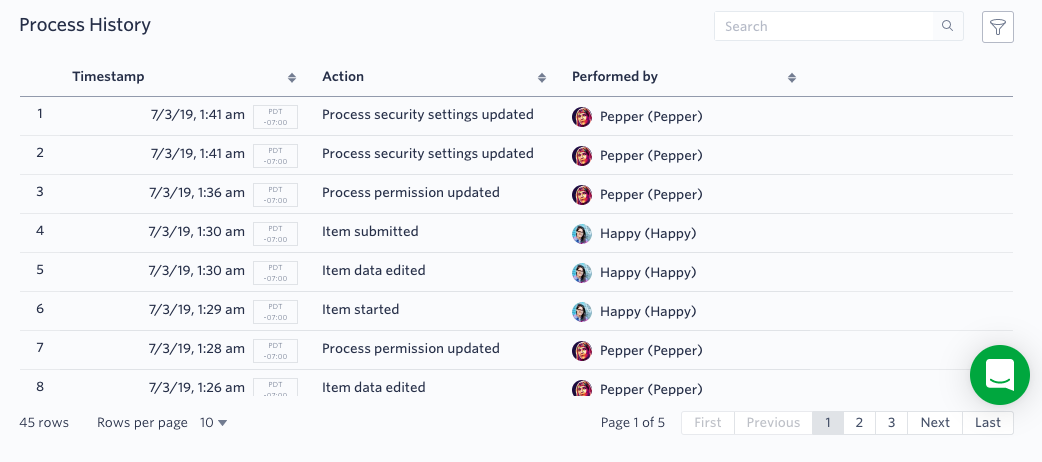
The process history shows:
- Timestamp - The exact time when an action was performed.
- Action - What kind of action took place. Some of the actions are: process created, process permission updated, item reassigned, Item submitted, approver reassigned, etc.
- Performed by - The name of the person who performed the action.
- Request ID - A unique Request ID for every action that takes place. This can be used for support purposes.
Additionally, you can search and filter fields in your process history.
Archiving and deleting a process
You can archive a process when you don’t need it anymore. When you archive a process, no one can view or take action on any item. However, all of the data is retained.
To archive a process, click the More options button (
To unarchive a process, click View All in the left navigation panel to open the Explorer. You can use the search box, or in the section called Status, select the Archived checkbox on the left. Click on the process you want, and then click Unarchive. When you unarchive a process, your form, workflow, and all item history will be restored to what it was when you archived it.
You can also permanently delete the process by clicking Delete.
Duplicating a process
If you want to make a process very similar to another one, you can duplicate the process. The duplicated process will have the same configured fields, sections, tables, workflow, and permissions. There will not be any data and items for the duplicated process.
- Click the More options button (
- The default name of the new process is Copy of <original process name>.. You can change the name.
- Select if you want to duplicate with all the same reports and integrations as the original process.
- Click Duplicate
After a process is duplicated, it will be locked for submission, i.e. users will not be able to initiate items. This happens so that you can check your reports and integrations manually before anyone uses it. To enable users to initiate items, follow the instructions above.