Setting up SCIM with Azure Active Directory
Modified 5 years ago
Abhiram
- Generating a Base URL and SCIM token
- Adding users and groups in Azure AD
- Creating a new enterprise application in Azure AD
- Assigning users to Azure enterprise application
- Provisioning your enterprise app
- Mapping attributes of AD groups
- Mapping default attributes of AD users
- Adding Kissflow custom schema attributes
- Mapping Kissflow custom schema attributes
- Provisioning status
User provisioning through SCIM 2.0 is only available through the hosted AD version called Azure Active Directory (AD). Kissflow Account Owners, Super Admins, and User Admins can set up SCIM-based user sync for Azure AD. Kissflow requires you to create an Azure enterprise application to sync your Azure AD users with your Kissflow account.
Generating a Base URL and SCIM token
- Inside Kissflow, navigate to Admin > User Management and click Configure SCIM.
- Generate a SCIM token, copy the Base URL and SCIM token to the clipboard. As you will need to paste these in your Azure Enterprise application later, we recommend you download the JSON file that contains your unique Base URL and SCIM token.You must keep the SCIM token secure as the token once generated will not be available again for copy or download.
Adding users and groups in Azure AD
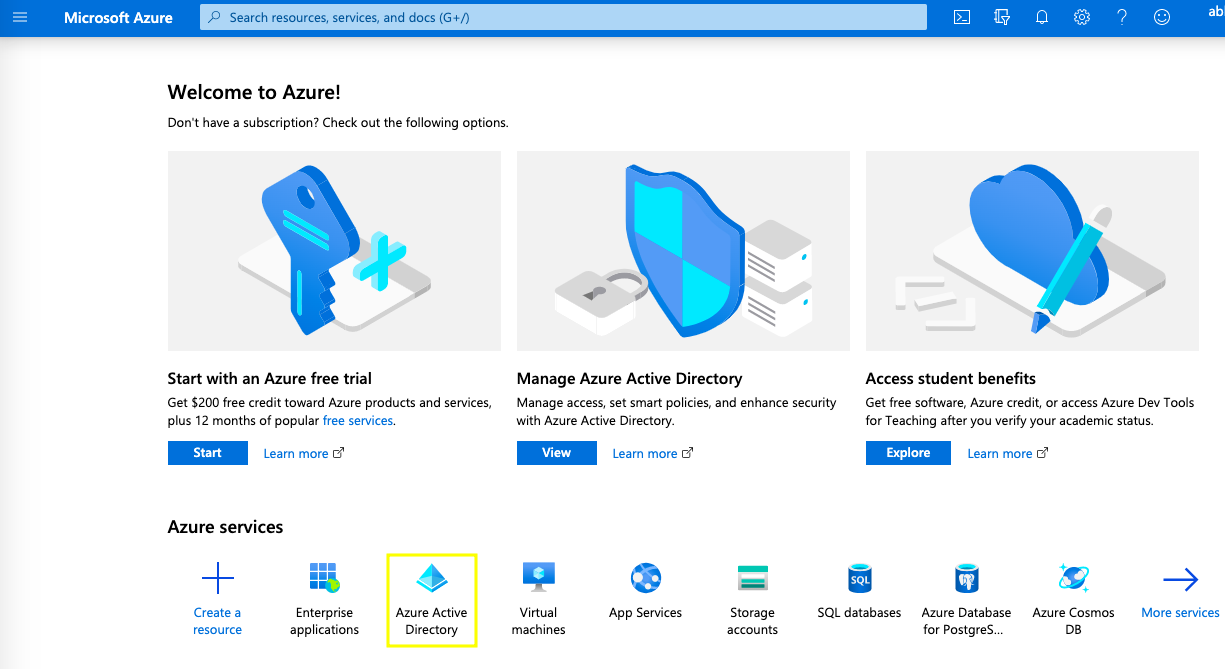
- After signing into Microsoft Azure, under Azure Services select Azure Active Directory.
- You will be redirected to Default Directory Overview page, here on the left panel, under Manage, click Users or Groups based on what you want to create.
- To create or invite new users to Azure AD, click the + New User button, update the user attribute values under Identity, groups and roles, settings, and job info and click create.
- Similarly, to create groups in Azure AD, click the + New group button, update the group attribute values and click create.
Creating a new enterprise application in Azure AD
- Sign into your Azure Active Directory as an Administrator, go to Enterprise applications.
- Select New application and choose Non-gallery application.
- You will be asked for a name, enter a meaningful name for your enterprise app and click Add.


Assigning users to Azure enterprise application
- On your enterprise app's left panel, under Manage, click the Users and groups tab.
- Click the + Add user button, then manually select users and groups those of whom you want to sync with your Kissflow account.
- Click Assign. You can assign multiple AD users and groups to your enterprise app. Only those users and groups that're assigned to your enterprise app can be provisioned to your Kissflow account.
Provisioning your enterprise app
- Next, go to the Provisioning tab in your enterprise app.
- From the Provisioning Mode dropdown, select Automatic.
- Under Admin Credentials, paste your copied SCIM Base URL in the Tenant URL field and the SCIM token in the Secret Token field.
- Click Test Connection; a success toast message should appear.
- Click Save at the top of your screen.

Mapping attributes of AD groups
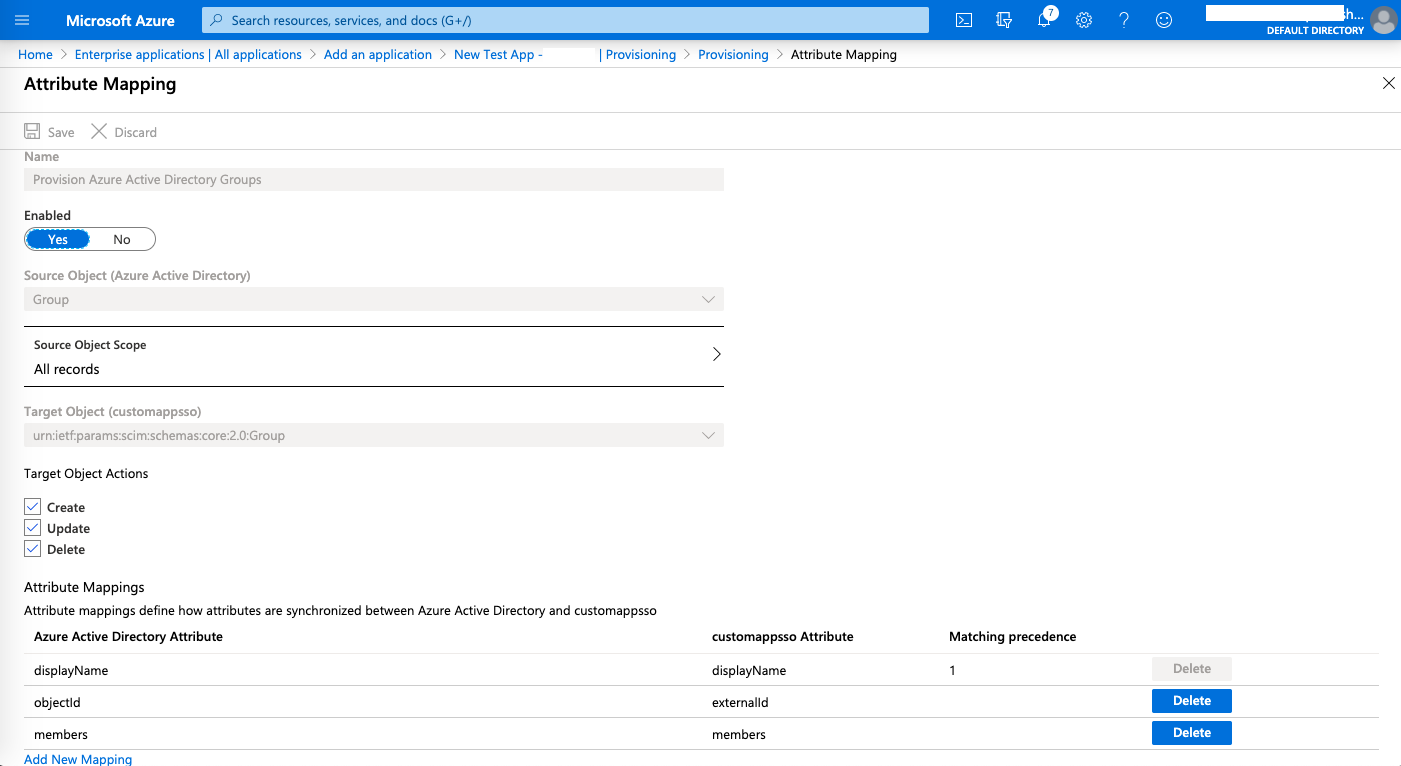
- Under Provisioning tab > Mappings, click "Provision Azure Active Directory Groups".

- Adjust your group Attribute mappings so that the result matches the following screenshot. Then, Save your changes.
Mapping default attributes of AD users
- Under Provisioning > Mappings, click "Provision Azure Active Directory Users".
- Here, adjust your user Attribute mappings so as to include only those attributes of your Azure AD users that you want in Kissflow. You must delete all unwanted attributes for a successful provisioning to happen. You can arrange your default attributes as shown in the below screenshot. Click the Save button every time you perform an action within attribute mapping.

- These are the important points to note when you edit the AD user attributes:
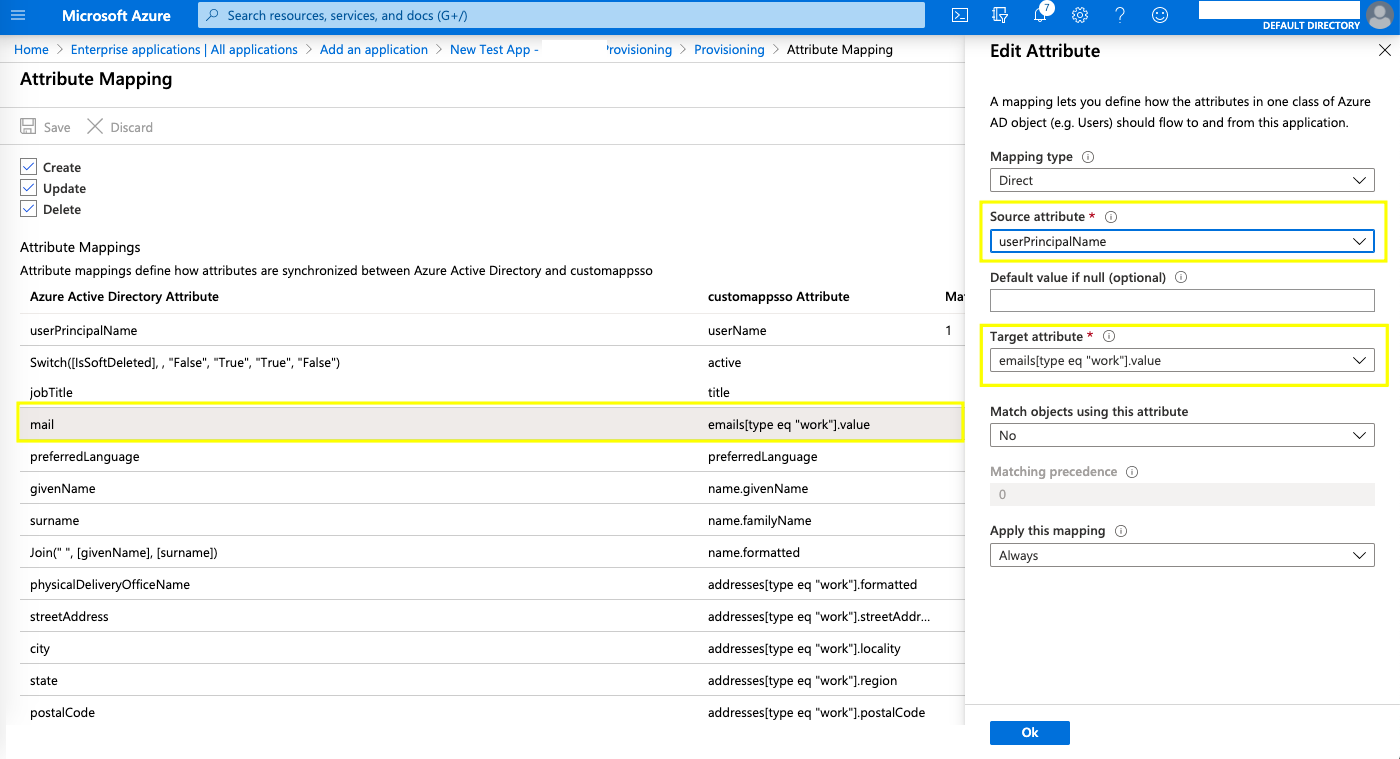
- As shown in the image below, for the target customappsso attribute "emails[type eq "work"].value", change the source attribute from "mail" to "userPrincipalName" as shown here.
- Similarly, for the target customappsso attribute "active", change the default expression value from "Switch([IsSoftDeleted], , "False", "True", "True", "False")" to "Not([IsSoftDeleted])" as shown below.
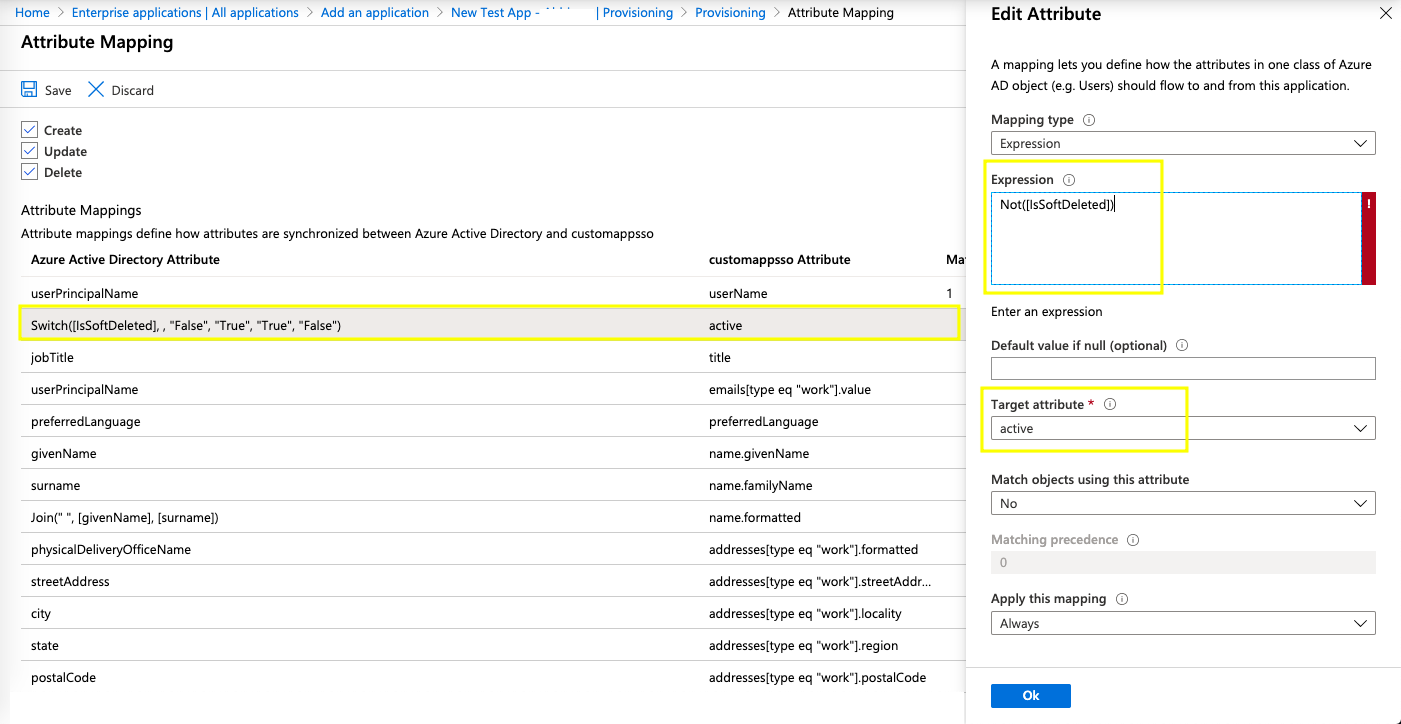
- Also, for the target customappsso attribute "externalId", change the source attribute from "mailNickname" to "objectId" as shown below.

- For Azure AD attribute jobTitle, values will be auto-updated in the Designation field of Kissflow User Management table after a successful SCIM sync.
- As shown in the image below, for the target customappsso attribute "emails[type eq "work"].value", change the source attribute from "mail" to "userPrincipalName" as shown here.
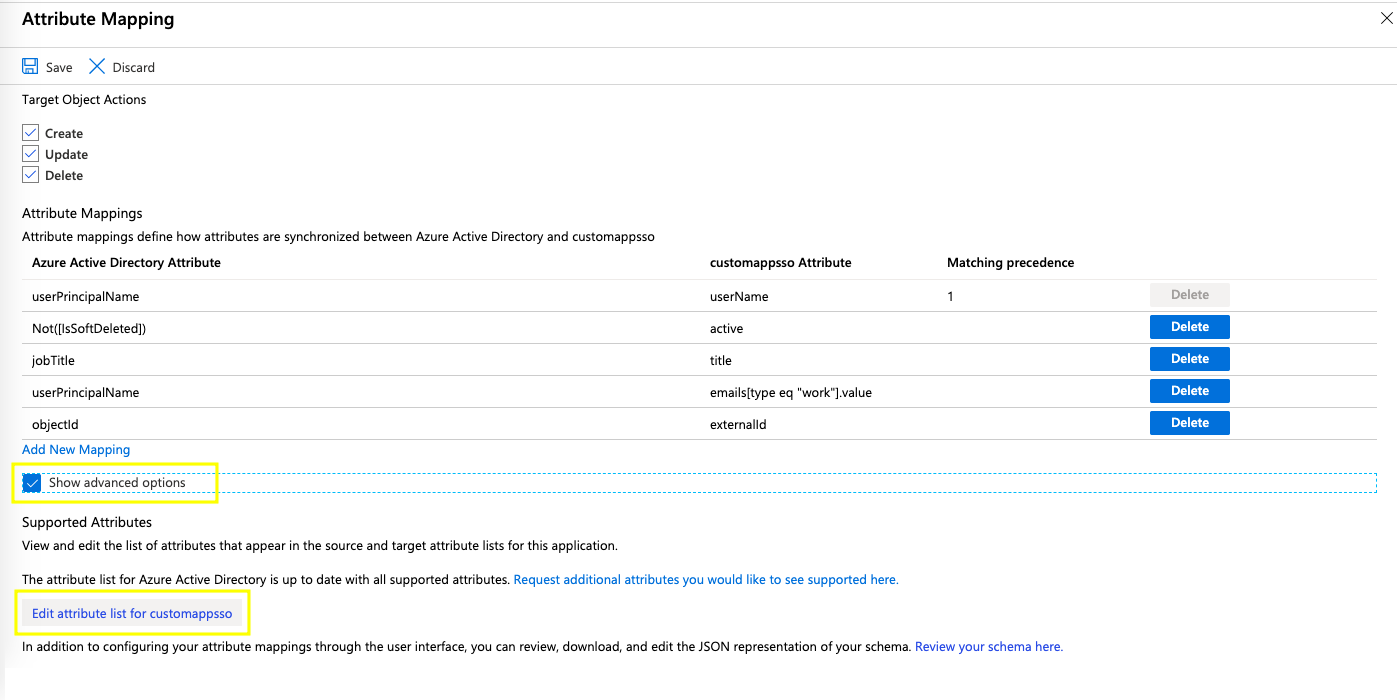
- Once the above attributes are successfully mapped, delete all unwanted attributes that you don't want in Kissflow. These attributes include, facsimileTelephoneNumber, state, city, mobile, streetAdress, etc.
Since, Kissflow does not support the SCIM 2.0 Enterprise User schema extension, you'll also have to delete the default attributes like employeeId, department, and manager from the list. Instead, you will need to separately add custom target attribute values for these attributes.
Adding Kissflow custom schema attributes
- To add these custom attributes from Kissflow, enable the Show advanced options checkbox, then click Edit attribute list for customappsso.
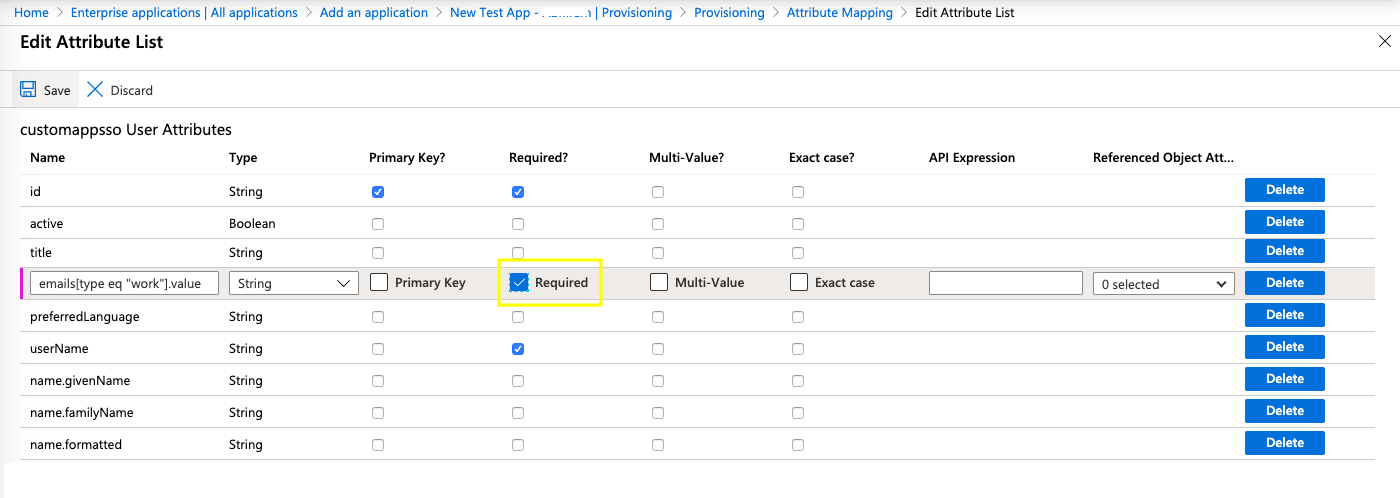
- Before updating the customappsso schema, make sure you also mark the AD source attribute "userPrincipalName" to required as shown below. This action will automate synchronization of Azure AD email addresses with Kissflow during account provisioning.
- To add a customappsso User Attribute, copy the urn expression from the table below for each of the AD attributes and paste them in the blank field under customappsso User Attributes.
- Next, change the Attribute type as listed in the table below.
- Finally, you must select the following Referenced Object Attribute from the dropdown, "urn:ietf:params:scim:schemas:extension:enterprise:2.0:User". Leave the “Reference Object Attribute” blank unless the “Type“ is set to “Reference”.
- Click Save to create a custom attribute mapping. In a similar way, you can create custom attributes for other AD attributes listed in the table below.
Here's an example of how this mapping is done inside the Azure enterprise app.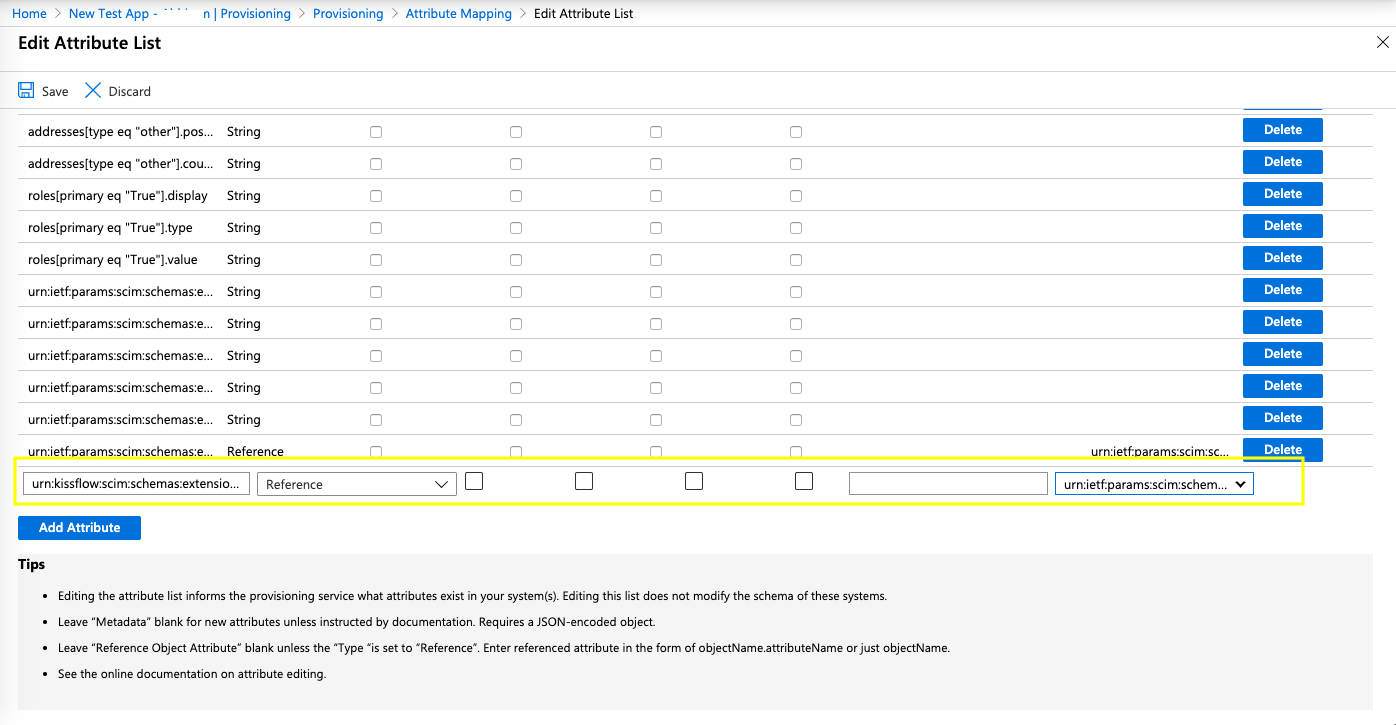
Azure Active Directory Attribute | Attribute type | customappsso User Attributes |
manager | Reference | urn:kissflow:scim:schemas:extension:Kissflow Account ID:2:User:{Manager field ID in Kissflow}.value |
department | String | urn:kissflow:scim:schemas:extension:Kissflow Account ID:2:User:{Department field ID in Kissflow} |
User type | String | urn:kissflow:scim:schemas:extension:Kissflow Account ID:2:User:{User type field ID in Kissflow}.value |
Number | Number | urn:kissflow:scim:schemas:extension:Kissflow Account ID:2:User:{Unique Number field ID in Kissflow} |
Currency | String | urn:kissflow:scim:schemas:extension:Kissflow Account ID:2:User:{Unique Currency field ID in Kissflow} |
Date | String | urn:kissflow:scim:schemas:extension:Kissflow Account ID:2:User:{Date field ID in Kissflow} |
Date time | String | urn:kissflow:scim:schemas:extension:Kissflow Account ID:2:User:{Date-time field ID in Kissflow} |
Yes/No | Boolean | urn:kissflow:scim:schemas:extension:Kissflow Account ID:2:User:{Boolean field yes/no in Kissflow} |
Dropdown | String | urn:kissflow:scim:schemas:extension:Kissflow Account ID:2:User:{Dropdown field ID in Kissflow} |
Mapping Kissflow custom schema attributes
The customappsso attributes that you map here are created using the steps mentioned above. These customappsso attributes get mapped to the relevant AD attributes that you want to sync with Kissflow.
- To map your customappsso attribute, go back to the User Attribute Mapping screen.
- Click Add New Mapping.
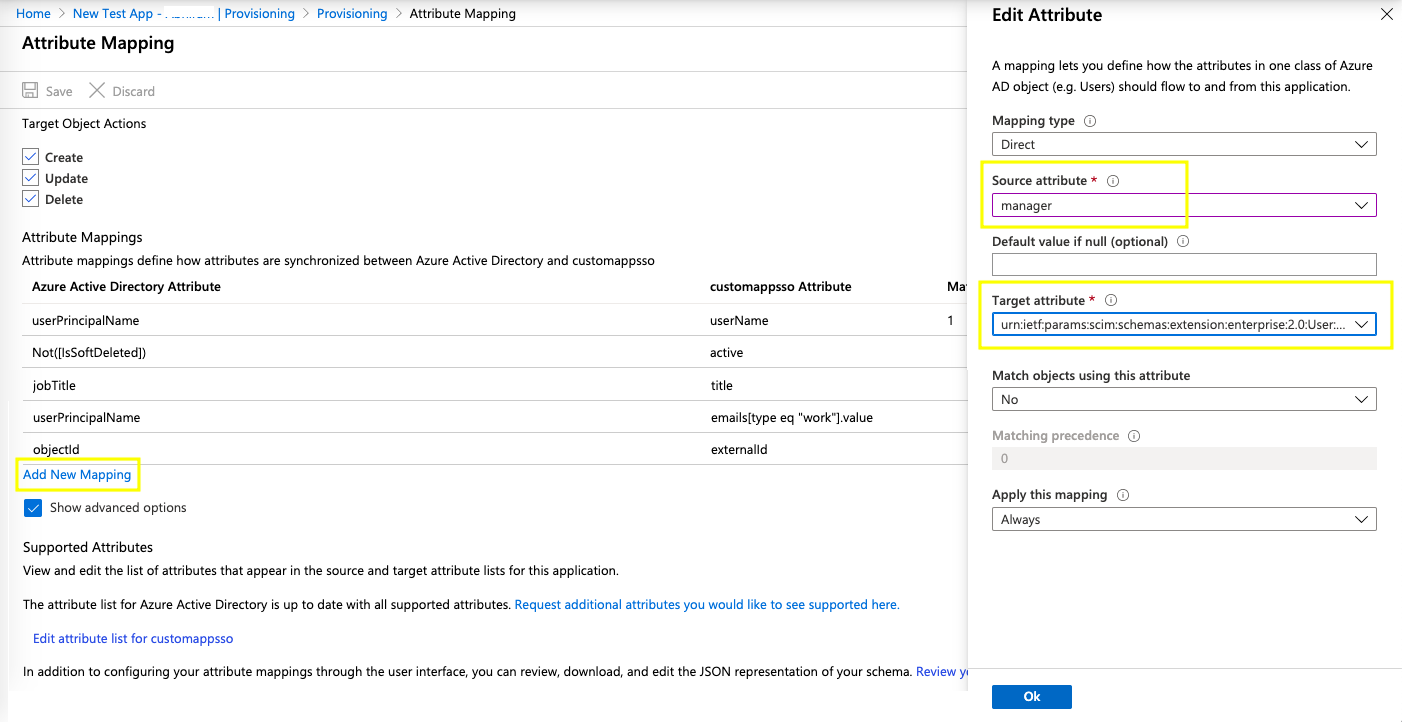
- In the source attribute field, select the relevant Azure AD Attribute that you've created, for example, manager. Similarly, in the Target attribute field, select the relevant customappsso user attribute that you've defined. You can map all your custom attributes that you've added previously.
- Click Save to confirm provisioning.
Provisioning status
- Under Provisioning tab > Settings section, switch Provisioning Status to On.
- Pick the Scope as Sync only assigned users and groups and click Save.
- Under current status, click refresh. This will initiate user provisioning between Azure AD and Kissflow.
- Wait for some time to see the provisioning status in your enterprise app. Once the provisioning is completed, AD users and groups can be seen inside Kissflow user management table with relevant attribute values.
